<?xml version="1.0" encoding="utf-8"?><feed xmlns="http://www.w3.org/2005/Atom" ><generator uri="https://jekyllrb.com/" version="4.3.2">Jekyll</generator><link href="https://robsonjr.com.br/feed.xml" rel="self" type="application/atom+xml" /><link href="https://robsonjr.com.br/" rel="alternate" type="text/html" /><updated>2025-07-28T14:10:25+00:00</updated><id>https://robsonjr.com.br/feed.xml</id><title type="html">Robson Braga</title><subtitle>Sharing my learnings and thoughts.</subtitle><entry><title type="html">Understanding Kubernetes Setup from Scratch</title><link href="https://robsonjr.com.br/2024/04/02/understanding-kubernetes-setup-from-scratch" rel="alternate" type="text/html" title="Understanding Kubernetes Setup from Scratch" /><published>2024-04-02T15:26:03+00:00</published><updated>2024-04-02T15:26:03+00:00</updated><id>https://robsonjr.com.br/2024/04/02/understanding-kubernetes-setup-from-scratch</id><content type="html" xml:base="https://robsonjr.com.br/2024/04/02/understanding-kubernetes-setup-from-scratch"><![CDATA[<h1 id="kubernetes">Kubernetes</h1>

<p><a href="https://kubernetes.io/">Kubernetes</a>, also known as K8s, is an open-source system for orchestrating containerized applications.</p>

<p>The time to first interaction with a k8s cluster is very quick and native resources are easy to understand. 
There are a lot of k8s distros that make it even easier.</p>
<ul>
  <li><a href="https://microk8s.io/">microk8s.io</a></li>
  <li><a href="https://minikube.sigs.k8s.io/docs/start/">minikube</a></li>
</ul>

<p>However, core concepts and build blocks for kubernetes componentes need more attention. We have to go through documentation
to see how everything works (<a href="https://en.wikipedia.org/wiki/RTFM">you should read the manual</a>).</p>

<p>This is my main motivation to share <a href="https://github.com/rbcbj/k8s-from-scratch">k8s-from-scratch</a> so new users can understand better
how the setup components of kubernetes is performed.</p>

<h2 id="components">Components</h2>

<p>The kubernetes abstract the components in two groups, Control Plane, and Worker Node. Ultimately, worker node components
can also exist in Control Plane node, and we can control ability to schedule a pod with <a href="https://kubernetes.io/docs/concepts/scheduling-eviction/taint-and-toleration/">taints and tolerations</a>.</p>

<p>Control Plane:</p>
<ul>
  <li>kube-apiserver</li>
  <li>kube-scheduler</li>
  <li>kube-controller-manager</li>
  <li>etcd</li>
</ul>

<p>Worker Node:</p>
<ul>
  <li>container runtime</li>
  <li>network plugin</li>
  <li>kubelet</li>
  <li>kube-proxy</li>
</ul>

<h2 id="component-authentication">Component Authentication</h2>

<p>All the communication in kubernetes happens through kube-apiserver. It is the responsible for receiving/perceiving changes
and performing operations to keep everything in a desired state. That means, this is the point of the cluster that is exposed to receive
request from external agents.</p>

<p>All that traffic is made available through a secure channel using SSL, therefore, it will need a certificate matching <a href="https://en.wikipedia.org/wiki/IP_address">IP</a> or <a href="https://en.wikipedia.org/wiki/Fully_qualified_domain_name">FQDN</a> that your server is running on.</p>

<p>The same way, components that need to interact with kube-apiserver, will also require a certificate to identify themselves in each request.</p>

<p>With that identification dependency, kubernetes makes use of a chain of certificates, issued by a CA certificate where it will sign and validate
all other components. From this single point of truth, every single component can be validated with the signing CA certificate and ultimately
this is how component authentication and authorization works.</p>

<p>You can check the certificate chain creation in the <a href="https://github.com/rbcbj/k8s-from-scratch/blob/main/src/usr/local/scripts/bootstrap_certs">cert bootstrap script</a> in the repo.</p>

<h2 id="component-networking">Component networking</h2>

<p>There’s a component that plays an important role in container setup. The network plugin. The kubernetes integrates with CNI network plugins and the
management and setup is performed by that part.</p>

<p>The plugin we’ve used is the <a href="https://www.kube-router.io/">kube-router</a> to enable networking in our setup.</p>

<h2 id="closing-thoughts">Closing thoughts</h2>

<p>Kubernetes is an amazing platform do build customized components and knowing it through a deep-dive helps to see how everything is connected and how it works.</p>

<p>Take a look on <a href="https://github.com/rbcbj/k8s-from-scratch">k8s-from-scratch</a> for the full build and try it out.</p>]]></content><author><name></name></author><category term="linux" /><category term="shellscript" /><category term="docker" /><category term="kubernetes" /><category term="k8s" /><summary type="html"><![CDATA[Kubernetes Kubernetes, also known as K8s, is an open-source system for orchestrating containerized applications. The time to first interaction with a k8s cluster is very quick and native resources are easy to understand. There are a lot of k8s distros that make it even easier. microk8s.io minikube However, core concepts and build blocks for kubernetes componentes need more attention. We have to go through documentation to see how everything works (you should read the manual). This is my main motivation to share k8s-from-scratch so new users can understand better how the setup components of kubernetes is performed. Components The kubernetes abstract the components in two groups, Control Plane, and Worker Node. Ultimately, worker node components can also exist in Control Plane node, and we can control ability to schedule a pod with taints and tolerations. Control Plane: kube-apiserver kube-scheduler kube-controller-manager etcd Worker Node: container runtime network plugin kubelet kube-proxy Component Authentication All the communication in kubernetes happens through kube-apiserver. It is the responsible for receiving/perceiving changes and performing operations to keep everything in a desired state. That means, this is the point of the cluster that is exposed to receive request from external agents. All that traffic is made available through a secure channel using SSL, therefore, it will need a certificate matching IP or FQDN that your server is running on. The same way, components that need to interact with kube-apiserver, will also require a certificate to identify themselves in each request. With that identification dependency, kubernetes makes use of a chain of certificates, issued by a CA certificate where it will sign and validate all other components. From this single point of truth, every single component can be validated with the signing CA certificate and ultimately this is how component authentication and authorization works. You can check the certificate chain creation in the cert bootstrap script in the repo. Component networking There’s a component that plays an important role in container setup. The network plugin. The kubernetes integrates with CNI network plugins and the management and setup is performed by that part. The plugin we’ve used is the kube-router to enable networking in our setup. Closing thoughts Kubernetes is an amazing platform do build customized components and knowing it through a deep-dive helps to see how everything is connected and how it works. Take a look on k8s-from-scratch for the full build and try it out.]]></summary></entry><entry><title type="html">Thoughts on layered image build with docker</title><link href="https://robsonjr.com.br/2022/04/07/thoughts-on-layered-image-build-with-docker" rel="alternate" type="text/html" title="Thoughts on layered image build with docker" /><published>2022-04-07T15:26:03+00:00</published><updated>2022-04-07T15:26:03+00:00</updated><id>https://robsonjr.com.br/2022/04/07/thoughts-on-layered-image-build-with-docker</id><content type="html" xml:base="https://robsonjr.com.br/2022/04/07/thoughts-on-layered-image-build-with-docker"><![CDATA[<p><a href="https://www.docker.com/">Docker</a> is an amazing abstraction on how we can put resources and environment configuration in controlled scopes.</p>

<p>With that in mind, for some time now, I’ve been using docker containers to run various gui applications that I didn’t wanted to install on my host machine (on my personal machine I use Ubuntu LTS).</p>

<p>Being able to do that is already an amazing thing, to jail application in a container and have fully control of it, though I’ve had some problems on image building dependencies.</p>

<p>For example, I would have this snippet to install <a href="https://www.nvidia.com/">nvidia</a> drivers and interface libs, so I would copy that snippet on all images for gui applications image build.</p>

<p>That was a very naive approach that worked. Though I needed to improve it, because rebuilding the images was taking too long. I needed a dependency to rebuild images for environments.</p>

<p>There were some options to perform what I wanted:</p>

<h1 id="multistage-build">Multistage build</h1>

<p>For <a href="https://docs.docker.com/develop/develop-images/multistage-build/">multistage build</a>, on the same <a href="https://docs.docker.com/develop/develop-images/multistage-build/">Dockerfile</a> you are able to set a dependency build using multistage. That will help if you need to make some environment setup to build some artifact and then export it and bake a smaller image.</p>

<p>Example (source snippet from <a href="https://docs.docker.com/develop/develop-images/multistage-build/">docker docs</a>):</p>

<div class="language-dockerfile highlighter-rouge"><div class="highlight"><pre class="highlight"><code><span class="k">FROM</span><span class="s"> golang:1.16</span>
<span class="k">WORKDIR</span><span class="s"> /go/src/github.com/alexellis/href-counter/</span>
<span class="k">RUN </span>go get <span class="nt">-d</span> <span class="nt">-v</span> golang.org/x/net/html  
<span class="k">COPY</span><span class="s"> app.go ./</span>
<span class="k">RUN </span><span class="nv">CGO_ENABLED</span><span class="o">=</span>0 <span class="nv">GOOS</span><span class="o">=</span>linux go build <span class="nt">-a</span> <span class="nt">-installsuffix</span> cgo <span class="nt">-o</span> app .

<span class="k">FROM</span><span class="s"> alpine:latest  </span>
<span class="k">RUN </span>apk <span class="nt">--no-cache</span> add ca-certificates
<span class="k">WORKDIR</span><span class="s"> /root/</span>
<span class="k">COPY</span><span class="s"> --from=0 /go/src/github.com/alexellis/href-counter/app ./</span>
<span class="k">CMD</span><span class="s"> ["./app"]</span>
</code></pre></div></div>

<p>The image generated from this is the perfect solution for golang builds as we will not need the golang runtime inside the image and will only need the output binary.</p>

<p>This is an improvement, though still not what I wanted.</p>

<h1 id="dockerfile-build-arg">Dockerfile –build-arg</h1>

<p>Docker allows you to define <a href="https://docs.docker.com/engine/reference/commandline/build/#options">build time arguments</a> to provide configuration for your build images. You can use it to customize the docker build and keep it dynamic.</p>

<p>So, what do you think if we take a look on something like this:</p>

<div class="language-plaintext highlighter-rouge"><div class="highlight"><pre class="highlight"><code>ARG BASE_IMAGE
FROM $BASE_IMAGE
</code></pre></div></div>

<p>Exactly! You can build your image from a dynamic configuration. By using that, we can revamp the build process for docker images.</p>

<p>Imagine the context where you have different <strong>Dockerfile</strong> to create environment images for: golang, java, php, node, etc. Then you can make layer iteration and build it over the previous build.</p>

<p>The solution that worked for me involved <strong>build-args</strong> and <strong>Makefiles</strong></p>

<h1 id="docker-layered-solution-with-build-arg-and-makefile">Docker layered solution with build-arg and Makefile</h1>

<p>The <strong>Gnu Make</strong> is almost omnipresent in linux environments and will allow us to build rules and dependencies to control our build.</p>

<p>Our abstraction will work like this:</p>

<div class="language-plaintext highlighter-rouge"><div class="highlight"><pre class="highlight"><code>root dir
|_ Makefile
| |_layer
| | |_golang
| | | |_Dockerfile
| | | |_Makefile
| | |_java
| | | |_Dockerfile
| | | |_Makefile
| | |_php
| | | |_Dockerfile
| | | |_Makefile
| |_utils
| |_EnvVars.mk
</code></pre></div></div>

<p>With that folder structure, we will able to define sub-rules on each Makefile. For this solution, we tried to keep code copy at a minimum and we have extracted the common rules into the util <strong>EnvVars.mk</strong> file.</p>

<p>Let’s take a look on the EnvVars.mk file:</p>

<div class="language-plaintext highlighter-rouge"><div class="highlight"><pre class="highlight"><code>REPO ?= 10.10.0.1:5000
REPO_PUSH ?= n

ifeq ($(BASE_IMAGE),)
	IMAGE = $(REPO)/$(PROJECT):$(TAG)
else
	IMAGE = $(BASE_IMAGE)-$(PROJECT)$(TAG)
	BUILD_ARG_BASE_IMAGE = --build-arg BASE_IMAGE=${BASE_IMAGE}
endif

ifneq ($(REPO),)
	BUILD_ARG_REPO = --build-arg REPO=$(REPO)
endif

all:
	@echo "Available targets:"
	@echo ""
	@echo "In case you want to push the image to remote, please, define:"
	@echo "  REPO_PUSH=y"
	@echo ""
	@echo "  * build - build a Docker image for $(IMAGE)"
	@echo "  * save - export the docker image"
	@echo "  * test - run a bash for the image"
	@echo "  * send-do - send the exported image to do and import it there"

.PHONY: build
build: Dockerfile
	docker build -t $(IMAGE) \
	                $(BUILD_ARG_REPO) $(BUILD_ARG_BASE_IMAGE) \
	                .

	if [ $(REPO_PUSH) = "y" ]; then \
		docker push $(IMAGE); \
	fi
</code></pre></div></div>

<p>Let’s understand what’s happening:</p>

<ul>
  <li>At the beginning, we do some checks do define the <strong>IMAGE</strong> name and <strong>BUILD_ARG_REPO</strong> and <strong>BUILD_ARG_BASE_IMAGE</strong></li>
  <li>In case <strong>BASE_IMAGE</strong> is provided, we will pass it as a config to the Dockerfile at build time and will append our docker image name and tag to the base image, to make it easier to identify</li>
</ul>

<p>For the next file, lets take a look on the root <strong>Makefile</strong> file:</p>

<div class="language-plaintext highlighter-rouge"><div class="highlight"><pre class="highlight"><code>BASE_IMAGE = 10.10.0.1:5000/ubuntu20.04
NVIDIA_IMAGE = $(BASE_IMAGE)-nvidia470

.PHONY: nvidia
nvidia:
	BASE_IMAGE=$(BASE_IMAGE) \
	REPO_PUSH=y \
	make -C gui/nvidia build 

.PHONY: java-ui
java-ui: nvidia
	BASE_IMAGE=$(NVIDIA_IMAGE) \
	REPO_PUSH=y \
	make -C layers/java build 

.PHONY: jetbrains-idea
jetbrains-idea: java-ui
	BASE_IMAGE=$(NVIDIA_IMAGE)-java8 \
	REPO_PUSH=y \
	make -C gui/jetbrains/idea-ce build
</code></pre></div></div>

<p>In this file we define the build dependency between images and as you can see, building the image <strong>jetbrains-idea</strong> will trigger the dependency calls.</p>

<p>For the last step, let’s take a look on an example image build:</p>

<p>Java image <strong>Dockerfile</strong>:</p>

<div class="language-dockerfile highlighter-rouge"><div class="highlight"><pre class="highlight"><code><span class="k">ARG</span><span class="s"> BASE_IMAGE</span>
<span class="k">FROM</span><span class="s"> $BASE_IMAGE</span>

<span class="k">ENV</span><span class="s"> DEBIAN_FRONTEND noninteractive</span>

<span class="k">RUN </span><span class="nb">set</span> <span class="nt">-ex</span> <span class="se">\
</span>  <span class="o">&amp;&amp;</span> apt-get update <span class="se">\
</span>  <span class="o">&amp;&amp;</span> apt-get <span class="nb">install</span> <span class="nt">-y</span> <span class="nt">--no-install-recommends</span> <span class="se">\
</span>    ca-certificates <span class="se">\
</span>    openjdk-8-jdk openjdk-8-jdk-headless <span class="se">\
</span>  <span class="o">&amp;&amp;</span> apt-get clean <span class="se">\
</span>  <span class="o">&amp;&amp;</span> <span class="nb">rm</span> <span class="nt">-rf</span> /var/lib/apt/lists/<span class="k">*</span>
</code></pre></div></div>

<p>Java image <strong>Makefile</strong>:</p>

<div class="language-makefile highlighter-rouge"><div class="highlight"><pre class="highlight"><code><span class="k">include</span><span class="sx"> ../../utils/EnvVars.mk</span>

<span class="nv">PROJECT</span> <span class="o">?=</span> java
<span class="nv">TAG</span>     <span class="o">?=</span> 8
</code></pre></div></div>

<p>With these steps, I was able to achieve what I wanted (at least for now) in terms of dependency docker image build with a minimum of automation.</p>

<div class="language-plaintext highlighter-rouge"><div class="highlight"><pre class="highlight"><code>$ docker images
REPOSITORY                                                           TAG       IMAGE ID       CREATED        SIZE
10.10.0.1:5000/ubuntu20.04-nvidia470-nodejs16-webstorm2021.3.3   latest    18848f100d1a   13 hours ago   3.84GB
10.10.0.1:5000/ubuntu20.04-nvidia470-nodejs16                    latest    7e8d98a3d833   13 hours ago   2.43GB
10.10.0.1:5000/ubuntu20.04-nvidia470-go1.17-goland2021.2.3       latest    c9a2069d0d5a   16 hours ago   4.13GB
10.10.0.1:5000/ubuntu20.04-nvidia470-go1.17                      latest    b841a419c134   16 hours ago   2.74GB
10.10.0.1:5000/ubuntu20.04-nvidia470-java8-idea.ce2021.3.2       latest    7233e95dbacd   16 hours ago   4.77GB
10.10.0.1:5000/ubuntu20.04-nvidia470-java8                       latest    01189dbfab29   16 hours ago   2.5GB
10.10.0.1:5000/ubuntu20.04-nvidia470                             latest    452c8f71a46a   16 hours ago   2.33GB
10.10.0.1:5000/ubuntu20.04                                       latest    825d55fb6340   2 days ago     72.8MB
</code></pre></div></div>

<p>Let me know what you think. Thank you for reading it.</p>]]></content><author><name></name></author><category term="linux" /><category term="shellscript" /><category term="docker" /><summary type="html"><![CDATA[Docker is an amazing abstraction on how we can put resources and environment configuration in controlled scopes. With that in mind, for some time now, I’ve been using docker containers to run various gui applications that I didn’t wanted to install on my host machine (on my personal machine I use Ubuntu LTS). Being able to do that is already an amazing thing, to jail application in a container and have fully control of it, though I’ve had some problems on image building dependencies. For example, I would have this snippet to install nvidia drivers and interface libs, so I would copy that snippet on all images for gui applications image build. That was a very naive approach that worked. Though I needed to improve it, because rebuilding the images was taking too long. I needed a dependency to rebuild images for environments. There were some options to perform what I wanted: Multistage build For multistage build, on the same Dockerfile you are able to set a dependency build using multistage. That will help if you need to make some environment setup to build some artifact and then export it and bake a smaller image. Example (source snippet from docker docs): FROM golang:1.16 WORKDIR /go/src/github.com/alexellis/href-counter/ RUN go get -d -v golang.org/x/net/html COPY app.go ./ RUN CGO_ENABLED=0 GOOS=linux go build -a -installsuffix cgo -o app . FROM alpine:latest RUN apk --no-cache add ca-certificates WORKDIR /root/ COPY --from=0 /go/src/github.com/alexellis/href-counter/app ./ CMD ["./app"] The image generated from this is the perfect solution for golang builds as we will not need the golang runtime inside the image and will only need the output binary. This is an improvement, though still not what I wanted. Dockerfile –build-arg Docker allows you to define build time arguments to provide configuration for your build images. You can use it to customize the docker build and keep it dynamic. So, what do you think if we take a look on something like this: ARG BASE_IMAGE FROM $BASE_IMAGE Exactly! You can build your image from a dynamic configuration. By using that, we can revamp the build process for docker images. Imagine the context where you have different Dockerfile to create environment images for: golang, java, php, node, etc. Then you can make layer iteration and build it over the previous build. The solution that worked for me involved build-args and Makefiles Docker layered solution with build-arg and Makefile The Gnu Make is almost omnipresent in linux environments and will allow us to build rules and dependencies to control our build. Our abstraction will work like this: root dir |_ Makefile | |_layer | | |_golang | | | |_Dockerfile | | | |_Makefile | | |_java | | | |_Dockerfile | | | |_Makefile | | |_php | | | |_Dockerfile | | | |_Makefile | |_utils | |_EnvVars.mk With that folder structure, we will able to define sub-rules on each Makefile. For this solution, we tried to keep code copy at a minimum and we have extracted the common rules into the util EnvVars.mk file. Let’s take a look on the EnvVars.mk file: REPO ?= 10.10.0.1:5000 REPO_PUSH ?= n ifeq ($(BASE_IMAGE),) IMAGE = $(REPO)/$(PROJECT):$(TAG) else IMAGE = $(BASE_IMAGE)-$(PROJECT)$(TAG) BUILD_ARG_BASE_IMAGE = --build-arg BASE_IMAGE=${BASE_IMAGE} endif ifneq ($(REPO),) BUILD_ARG_REPO = --build-arg REPO=$(REPO) endif all: @echo "Available targets:" @echo "" @echo "In case you want to push the image to remote, please, define:" @echo " REPO_PUSH=y" @echo "" @echo " * build - build a Docker image for $(IMAGE)" @echo " * save - export the docker image" @echo " * test - run a bash for the image" @echo " * send-do - send the exported image to do and import it there" .PHONY: build build: Dockerfile docker build -t $(IMAGE) \ $(BUILD_ARG_REPO) $(BUILD_ARG_BASE_IMAGE) \ . if [ $(REPO_PUSH) = "y" ]; then \ docker push $(IMAGE); \ fi Let’s understand what’s happening: At the beginning, we do some checks do define the IMAGE name and BUILD_ARG_REPO and BUILD_ARG_BASE_IMAGE In case BASE_IMAGE is provided, we will pass it as a config to the Dockerfile at build time and will append our docker image name and tag to the base image, to make it easier to identify For the next file, lets take a look on the root Makefile file: BASE_IMAGE = 10.10.0.1:5000/ubuntu20.04 NVIDIA_IMAGE = $(BASE_IMAGE)-nvidia470 .PHONY: nvidia nvidia: BASE_IMAGE=$(BASE_IMAGE) \ REPO_PUSH=y \ make -C gui/nvidia build .PHONY: java-ui java-ui: nvidia BASE_IMAGE=$(NVIDIA_IMAGE) \ REPO_PUSH=y \ make -C layers/java build .PHONY: jetbrains-idea jetbrains-idea: java-ui BASE_IMAGE=$(NVIDIA_IMAGE)-java8 \ REPO_PUSH=y \ make -C gui/jetbrains/idea-ce build In this file we define the build dependency between images and as you can see, building the image jetbrains-idea will trigger the dependency calls. For the last step, let’s take a look on an example image build: Java image Dockerfile: ARG BASE_IMAGE FROM $BASE_IMAGE ENV DEBIAN_FRONTEND noninteractive RUN set -ex \ &amp;&amp; apt-get update \ &amp;&amp; apt-get install -y --no-install-recommends \ ca-certificates \ openjdk-8-jdk openjdk-8-jdk-headless \ &amp;&amp; apt-get clean \ &amp;&amp; rm -rf /var/lib/apt/lists/* Java image Makefile: include ../../utils/EnvVars.mk PROJECT ?= java TAG ?= 8 With these steps, I was able to achieve what I wanted (at least for now) in terms of dependency docker image build with a minimum of automation. $ docker images REPOSITORY TAG IMAGE ID CREATED SIZE 10.10.0.1:5000/ubuntu20.04-nvidia470-nodejs16-webstorm2021.3.3 latest 18848f100d1a 13 hours ago 3.84GB 10.10.0.1:5000/ubuntu20.04-nvidia470-nodejs16 latest 7e8d98a3d833 13 hours ago 2.43GB 10.10.0.1:5000/ubuntu20.04-nvidia470-go1.17-goland2021.2.3 latest c9a2069d0d5a 16 hours ago 4.13GB 10.10.0.1:5000/ubuntu20.04-nvidia470-go1.17 latest b841a419c134 16 hours ago 2.74GB 10.10.0.1:5000/ubuntu20.04-nvidia470-java8-idea.ce2021.3.2 latest 7233e95dbacd 16 hours ago 4.77GB 10.10.0.1:5000/ubuntu20.04-nvidia470-java8 latest 01189dbfab29 16 hours ago 2.5GB 10.10.0.1:5000/ubuntu20.04-nvidia470 latest 452c8f71a46a 16 hours ago 2.33GB 10.10.0.1:5000/ubuntu20.04 latest 825d55fb6340 2 days ago 72.8MB Let me know what you think. Thank you for reading it.]]></summary></entry><entry><title type="html">Hack CLaaT tool to allow use with offline html file</title><link href="https://robsonjr.com.br/2021/11/25/hack-claat-tool-to-allow-use-with-offline-html-file" rel="alternate" type="text/html" title="Hack CLaaT tool to allow use with offline html file" /><published>2021-11-25T15:26:03+00:00</published><updated>2021-11-25T15:26:03+00:00</updated><id>https://robsonjr.com.br/2021/11/25/hack-claat-tool-to-allow-use-with-offline-html-file</id><content type="html" xml:base="https://robsonjr.com.br/2021/11/25/hack-claat-tool-to-allow-use-with-offline-html-file"><![CDATA[<p>The <a href="https://github.com/googlecodelabs/tools">CLaaT (Codelabs as a Thing)</a> is a very nice piece of software.</p>

<p>It is used to built the amazing <a href="https://codelabs.developers.google.com/">Google Codelabs Docs</a>. The look and feel of the codelab is very motivating and cativating and will make reader to walk through steps and be able to follow complex guides without hassle.</p>

<p>The ClaaT tool is able to render those kind of docs from two sources:</p>

<ul>
  <li>Google Docs document</li>
  <li>Markup file</li>
</ul>

<p>The Google Docs is an almost perfect <a href="https://en.wikipedia.org/wiki/WYSIWYG">What You See Is What You Get (WYSIWYG)</a> text editor, and if you mix that with the CLaaT tool, you will get very good solution to be able to present codelabs just as the ones from Google.</p>

<h1 id="the-normal-way-of-rendering-the-codelabs">The normal way of rendering the codelabs:</h1>

<p>So, the recipe is quite easy:</p>

<ul>
  <li>Copy a <a href="https://docs.google.com/document/d/1E6XMcdTexh5O8JwGy42SY3Ehzi8gOfUGiqTiUX6N04o/edit">template</a> doc from Google Docs</li>
  <li>Keep the consistency with the template and make the changes that suits your needs</li>
  <li>Run the claat tool (binary or build it from code repository)</li>
  <li>Voilá! You will have your presentation that you can deploy and share on the internet.</li>
</ul>

<p>That’s it, right?</p>

<p><img src="/assets/images/2021/11/25/hack-claat-tool-to-allow-use-with-offline-html-file/Screenshot-from-2021-11-25-19-24-26-1024x719.png" alt="" /></p>

<h1 id="but-wait-theres-more">But wait! There’s more!</h1>

<p>The normal way of rendering the codelabs is very straightforward, you can’t get it wrong.</p>

<p>Thought, I had couple of questions:</p>

<ul>
  <li>Is it possible to render without <a href="https://oauth.net/2/">oauth</a> integration? Not all Google Workspace contract will allow that.</li>
  <li>Can I render it from an offline doc, as I want to save the doc offline as a source of truth?</li>
</ul>

<p>For all those questions the answer would be a <strong>no-go</strong>, as the tool would not be able to that for a local <strong>html</strong> file.</p>

<p>So, I took sometime to look the code and started to wonder the changes needed to be able to render the same codelab project from an offline html source file.</p>

<p>After some troubleshoot I could find the changes needed to be able to do that.</p>

<p>Let me explain those to you:</p>

<ul>
  <li>The CLaaT tool always assume that a local file will default to the markdown file</li>
  <li>If the tool didn’t find the file, it will query and ask the oauth authentication to have access to the Google Drive document Id.</li>
  <li>After that, the tool will fetch the html and during the execution will fetch all others image dependencies</li>
  <li>Will render the output</li>
</ul>

<p>That’s it! We mostly had all our work done, as the CLaaT tool will process an export from Google Docs.</p>

<p>So, long story short, for the changes we had to make, they will be 2 changes:</p>

<p><strong>1.</strong> On file <strong>claat/fetch/fetch.go</strong>, you will have to comment some lines for the function:</p>

<div class="language-go highlighter-rouge"><div class="highlight"><pre class="highlight"><code><span class="c">// SlurpCodelab retrieves and parses codelab source.</span>
<span class="c">// It takes the source, plus an auth token and a set of extra metadata to pass along.</span>
<span class="c">// It returns parsed codelab and its source type.</span>
<span class="c">//</span>
<span class="c">// The function will also fetch and parse fragments included</span>
<span class="c">// with nodes.ImportNode.</span>
<span class="k">func</span> <span class="p">(</span><span class="n">f</span> <span class="o">*</span><span class="n">Fetcher</span><span class="p">)</span> <span class="n">SlurpCodelab</span><span class="p">(</span><span class="n">src</span> <span class="kt">string</span><span class="p">,</span> <span class="n">output</span> <span class="kt">string</span><span class="p">)</span> <span class="p">(</span><span class="o">*</span><span class="n">codelab</span><span class="p">,</span> <span class="kt">error</span><span class="p">)</span> <span class="p">{</span>
    <span class="o">...</span>
 
    <span class="k">if</span> <span class="o">!</span><span class="n">isStdout</span><span class="p">(</span><span class="n">output</span><span class="p">)</span> <span class="p">{</span>
        <span class="c">// download or copy codelab assets to disk, and rewrite image URLs</span>
        <span class="k">var</span> <span class="n">nodes</span> <span class="p">[]</span><span class="n">nodes</span><span class="o">.</span><span class="n">Node</span>
        <span class="k">for</span> <span class="n">_</span><span class="p">,</span> <span class="n">step</span> <span class="o">:=</span> <span class="k">range</span> <span class="n">clab</span><span class="o">.</span><span class="n">Steps</span> <span class="p">{</span>
            <span class="n">nodes</span> <span class="o">=</span> <span class="nb">append</span><span class="p">(</span><span class="n">nodes</span><span class="p">,</span> <span class="n">step</span><span class="o">.</span><span class="n">Content</span><span class="o">.</span><span class="n">Nodes</span><span class="o">...</span><span class="p">)</span>
        <span class="p">}</span>
        <span class="c">//err := f.SlurpImages(src, imgDir, nodes, images)</span>
        <span class="c">//if err != nil {</span>
        <span class="c">//  return nil, err</span>
        <span class="c">//}</span>
    <span class="p">}</span>
 
    <span class="o">...</span>
<span class="p">}</span>
</code></pre></div></div>

<p>This change will avoid the tool from fetching external images (<strong>more on that below</strong>).</p>

<p><strong>2.</strong> On the <strong>same file</strong>, we have to do another change, this to define the default local file to be the Google Doc document:</p>

<div class="language-go highlighter-rouge"><div class="highlight"><pre class="highlight"><code><span class="c">// fetch retrieves codelab doc either from local disk</span>
<span class="c">// or a remote location.</span>
<span class="c">// The caller is responsible for closing returned stream.</span>
<span class="k">func</span> <span class="p">(</span><span class="n">f</span> <span class="o">*</span><span class="n">Fetcher</span><span class="p">)</span> <span class="n">fetch</span><span class="p">(</span><span class="n">name</span> <span class="kt">string</span><span class="p">)</span> <span class="p">(</span><span class="o">*</span><span class="n">resource</span><span class="p">,</span> <span class="kt">error</span><span class="p">)</span> <span class="p">{</span>
    <span class="o">...</span>
 
    <span class="k">return</span> <span class="o">&amp;</span><span class="n">resource</span><span class="p">{</span>
        <span class="n">body</span><span class="o">:</span> <span class="n">r</span><span class="p">,</span>
        <span class="n">typ</span><span class="o">:</span>  <span class="n">SrcGoogleDoc</span><span class="p">,</span>
        <span class="n">mod</span><span class="o">:</span>  <span class="n">fi</span><span class="o">.</span><span class="n">ModTime</span><span class="p">(),</span>
    <span class="p">},</span> <span class="no">nil</span>
<span class="p">}</span>
</code></pre></div></div>

<p>As you can see, we have changed the default from <strong>SrcMarkdown</strong> to <strong>SrcGoogleDoc</strong>.</p>

<p>The steps described before are working for the following commit version:</p>

<div class="language-plaintext highlighter-rouge"><div class="highlight"><pre class="highlight"><code>$ git show-ref HEAD
0f9386372553c3f0570eeca6889c675a74ec0abb refs/remotes/origin/HEAD
</code></pre></div></div>

<p>To be able to make it easier, please grab this patch and run this command while inside the source folder for the project.</p>

<div class="language-bash highlighter-rouge"><div class="highlight"><pre class="highlight"><code><span class="nv">$ </span>patch <span class="nt">-p1</span> &lt; path_to_the_patch_downloaded
</code></pre></div></div>

<h1 id="how-it-is-done">How it is done?</h1>

<p>The changes we made will allow two things:</p>

<ul>
  <li>Define the default local file as a Google Doc file</li>
  <li>Bypass the authentication needed to fetch the online doc</li>
</ul>

<p><strong>TL;DR</strong> it will make the tool think the local file is a Google Doc file.</p>

<p>First, as it is a hack, you should build it from source as from last section.</p>

<p>After that, we have the following steps:</p>

<ul>
  <li>On Google Docs, you have to export the doc to <strong>html</strong> using the menu <strong>File =&gt; Download =&gt; Web Page (.html, zipped)</strong></li>
  <li>Extract the zip with <strong>BOTH</strong>: html file and images referenced in the document</li>
  <li>Run CLaaT tool on the extracted html file</li>
  <li>Copy the images directory from the extracted zip into the destination folder (the same that the CLaaT tool output)</li>
</ul>

<p>With that, you will be able to generate the codelab from the local file, while being able to reference all the images locally.</p>

<p>That is true due to the exported html already had those references and when working on local file we have commented the code that replaces the reference that would otherwise fetch it from Google Docs.</p>

<h1 id="final-thoughts">Final thoughts</h1>

<p>As you can see, it is not a perfect solution. It will have some steps involved and it may need some update from time to time to keep it up to date.</p>

<p>Aside from that, it works perfectly! It will answer all those initial questions I was asking and It will give me back all the control I wanted over the offline doc.</p>

<p>😀</p>]]></content><author><name></name></author><category term="documentation" /><summary type="html"><![CDATA[The CLaaT (Codelabs as a Thing) is a very nice piece of software. 
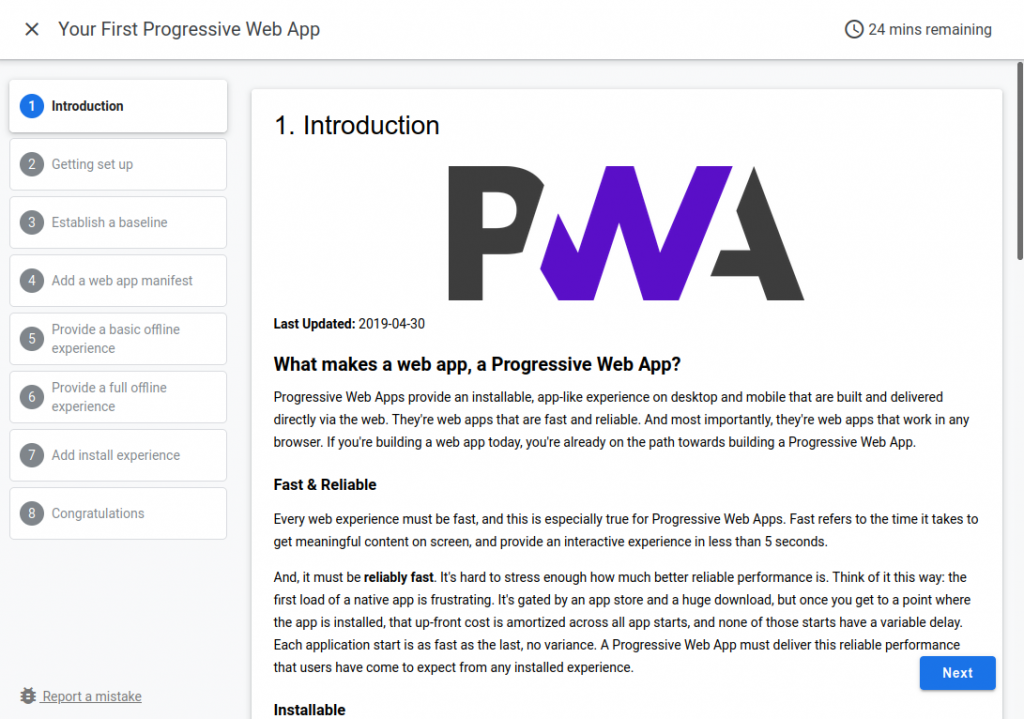
It is used to built the amazing Google Codelabs Docs. The look and feel of the codelab is very motivating and cativating and will make reader to walk through steps and be able to follow complex guides without hassle. The ClaaT tool is able to render those kind of docs from two sources: Google Docs document Markup file The Google Docs is an almost perfect What You See Is What You Get (WYSIWYG) text editor, and if you mix that with the CLaaT tool, you will get very good solution to be able to present codelabs just as the ones from Google. The normal way of rendering the codelabs: So, the recipe is quite easy: Copy a template doc from Google Docs Keep the consistency with the template and make the changes that suits your needs Run the claat tool (binary or build it from code repository) Voilá! You will have your presentation that you can deploy and share on the internet. That’s it, right? But wait! There’s more! The normal way of rendering the codelabs is very straightforward, you can’t get it wrong. Thought, I had couple of questions: Is it possible to render without oauth integration? Not all Google Workspace contract will allow that. Can I render it from an offline doc, as I want to save the doc offline as a source of truth? For all those questions the answer would be a no-go, as the tool would not be able to that for a local html file. So, I took sometime to look the code and started to wonder the changes needed to be able to render the same codelab project from an offline html source file. After some troubleshoot I could find the changes needed to be able to do that. Let me explain those to you: The CLaaT tool always assume that a local file will default to the markdown file If the tool didn’t find the file, it will query and ask the oauth authentication to have access to the Google Drive document Id. After that, the tool will fetch the html and during the execution will fetch all others image dependencies Will render the output That’s it! We mostly had all our work done, as the CLaaT tool will process an export from Google Docs. So, long story short, for the changes we had to make, they will be 2 changes: 1. On file claat/fetch/fetch.go, you will have to comment some lines for the function: // SlurpCodelab retrieves and parses codelab source. // It takes the source, plus an auth token and a set of extra metadata to pass along. // It returns parsed codelab and its source type. // // The function will also fetch and parse fragments included // with nodes.ImportNode. func (f *Fetcher) SlurpCodelab(src string, output string) (*codelab, error) { ... if !isStdout(output) { // download or copy codelab assets to disk, and rewrite image URLs var nodes []nodes.Node for _, step := range clab.Steps { nodes = append(nodes, step.Content.Nodes...) } //err := f.SlurpImages(src, imgDir, nodes, images) //if err != nil { // return nil, err //} } ... } This change will avoid the tool from fetching external images (more on that below). 2. On the same file, we have to do another change, this to define the default local file to be the Google Doc document: // fetch retrieves codelab doc either from local disk // or a remote location. // The caller is responsible for closing returned stream. func (f *Fetcher) fetch(name string) (*resource, error) { ... return &amp;resource{ body: r, typ: SrcGoogleDoc, mod: fi.ModTime(), }, nil } As you can see, we have changed the default from SrcMarkdown to SrcGoogleDoc. The steps described before are working for the following commit version: $ git show-ref HEAD 0f9386372553c3f0570eeca6889c675a74ec0abb refs/remotes/origin/HEAD To be able to make it easier, please grab this patch and run this command while inside the source folder for the project. $ patch -p1 &lt; path_to_the_patch_downloaded How it is done? The changes we made will allow two things: Define the default local file as a Google Doc file Bypass the authentication needed to fetch the online doc TL;DR it will make the tool think the local file is a Google Doc file. First, as it is a hack, you should build it from source as from last section. After that, we have the following steps: On Google Docs, you have to export the doc to html using the menu File =&gt; Download =&gt; Web Page (.html, zipped) Extract the zip with BOTH: html file and images referenced in the document Run CLaaT tool on the extracted html file Copy the images directory from the extracted zip into the destination folder (the same that the CLaaT tool output) With that, you will be able to generate the codelab from the local file, while being able to reference all the images locally. That is true due to the exported html already had those references and when working on local file we have commented the code that replaces the reference that would otherwise fetch it from Google Docs. Final thoughts As you can see, it is not a perfect solution. It will have some steps involved and it may need some update from time to time to keep it up to date. Aside from that, it works perfectly! It will answer all those initial questions I was asking and It will give me back all the control I wanted over the offline doc. 😀]]></summary></entry><entry><title type="html">Exposing minikube to external traffic using docker and nginx</title><link href="https://robsonjr.com.br/2021/11/06/exposing-minikube-to-external-traffic-using-docker-and-nginx" rel="alternate" type="text/html" title="Exposing minikube to external traffic using docker and nginx" /><published>2021-11-06T15:26:03+00:00</published><updated>2021-11-06T15:26:03+00:00</updated><id>https://robsonjr.com.br/2021/11/06/exposing-minikube-to-external-traffic-using-docker-and-nginx</id><content type="html" xml:base="https://robsonjr.com.br/2021/11/06/exposing-minikube-to-external-traffic-using-docker-and-nginx"><![CDATA[<h1 id="introduction">Introduction</h1>

<p>Things you will need to follow the steps.</p>

<ul>
  <li>Working vm instance and know it’s ip address</li>
  <li>Working installation of <a href="https://minikube.sigs.k8s.io/docs/start/">Minikube</a></li>
  <li>Working installation of <a href="https://www.docker.com/">docker</a> and some knowledge of how it works</li>
</ul>

<h1 id="motivation">Motivation</h1>

<p>Kubernetes is a really amazing piece of software and as I was studying it, I didn’t want to keep relying on the cloud providers to do the testing.</p>

<p>The next solution would be to rollout my own cluster. Though, I also didn’t want to setup a fully operational cluster. A single node, lightweight setup would do the job, that’s when I got my attention to minikube.</p>

<p>As of now, my current infra works virtualized. The host machine runs <strong>ubuntu 18.04</strong> and every individual environment will run in a vm using <strong>kvm/qemu</strong> with device passthrough as follows:</p>

<p><img src="/assets/images/2021/11/06/exposing-minikube-to-external-traffic-using-docker-and-nginx/diagram-vm-1.png" alt="" /></p>

<p>To make use of that structure, I would have to create a new vm and install minikube on it. I would also want to be able to access it externally using kubectl.</p>

<p>That kind of need had some caveats that I describe now:</p>

<p>The minikube instance is not meant to be used on production:</p>

<blockquote>
  <p>minikube is local Kubernetes, focusing on making it easy to learn and develop for Kubernetes.</p>

  <p>https://minikube.sigs.k8s.io/docs/start/</p>
</blockquote>

<p>So, it should be used to run a cluster on a secure environment. Preferably on a local deploy. That’s not what I wanted. <strong>I wanted it to behave as a cluster that I could access it remotely. Though, in a secure way.</strong></p>

<p>minikube uses the concept of <a href="https://minikube.sigs.k8s.io/docs/drivers/">drivers</a>, and I’ve considered some:</p>

<ul>
  <li><a href="https://minikube.sigs.k8s.io/docs/drivers/none/">none</a>: runs on bare-metal</li>
  <li><a href="https://minikube.sigs.k8s.io/docs/drivers/docker/">docker</a>: is the default driver</li>
  <li><a href="https://minikube.sigs.k8s.io/docs/drivers/ssh/">ssh</a>: will connect to the minikube cluster through ssh</li>
</ul>

<p>As I am already running the qemu/kvm on the host, I could’ve used the <a href="https://minikube.sigs.k8s.io/docs/drivers/kvm2/">kvm2</a> driver, though, I didn’t wanted to install minikube on the host machine and wanted to keep the environments independent.</p>

<p>Between pros and cons for my scenario, I’ve opted to run it using the docker driver.</p>

<p>Using the default docker driver, will keep the minikube instance inside the vm machine, and I wanted to access it, using <a href="https://kubernetes.io/docs/tasks/tools/">kubectl</a>, outside of the vm, something like this:</p>

<p><img src="/assets/images/2021/11/06/exposing-minikube-to-external-traffic-using-docker-and-nginx/diagram-minikube-access.png" alt="" /></p>

<p>And that’s the story, let me describe the steps.</p>

<p>😀</p>

<h1 id="start-minikube">Start minikube</h1>

<p>Before starting minikube, we <strong>need</strong> to find one information. The vm ip’s address. That will be very important it will be used to setup the minikube and also to connect using kubectl to the minikube, it will use a signed certificate to allow ip addresses.</p>

<p>The next step will be to configure minikube to embed the certificates into the <a href="https://kubernetes.io/docs/concepts/configuration/organize-cluster-access-kubeconfig/">kubeconfig</a> file, and we can do that by:</p>

<div class="language-bash highlighter-rouge"><div class="highlight"><pre class="highlight"><code><span class="nv">$ </span>minikube config get EmbedCerts <span class="nb">true</span>
</code></pre></div></div>

<p>Proceeding, to start minikube so we can use it externally you will need to issue the command (don’t forget the ip address of the vm):</p>

<div class="language-bash highlighter-rouge"><div class="highlight"><pre class="highlight"><code>minikube start <span class="nt">--cpus</span> 3 <span class="nt">--memory</span> 3024 <span class="nt">--apiserver-ips</span><span class="o">=</span>192.168.88.174
</code></pre></div></div>

<ul>
  <li><strong>–apiserver-ips</strong>: is used to sign the certificate and allow remote connection using kubectl</li>
</ul>

<p>In case you don’t use the <strong>–apiserver-ips</strong> parameter, you will receive the following error:</p>

<div class="language-plaintext highlighter-rouge"><div class="highlight"><pre class="highlight"><code>Unable to connect to the server: x509: certificate is valid for 192.168.49.2, 10.96.0.1, 127.0.0.1, 10.0.0.1, not 192.168.88.174
</code></pre></div></div>

<p>If everything turns out ok, you should see something like this:</p>

<div class="language-plaintext highlighter-rouge"><div class="highlight"><pre class="highlight"><code>$ minikube start --cpus 3 --memory 3024 --apiserver-ips=192.168.88.174
😄  minikube v1.23.2 on Ubuntu 18.04 (kvm/amd64)
✨  Automatically selected the docker driver
❗  Your cgroup does not allow setting memory.
    ▪ More information: https://docs.docker.com/engine/install/linux-postinstall/#your-kernel-does-not-support-cgroup-swap-limit-capabilities

🧯  The requested memory allocation of 3024MiB does not leave room for system overhead (total system memory: 3940MiB). You may face stability issues.
💡  Suggestion: Start minikube with less memory allocated: 'minikube start --memory=3024mb'

👍  Starting control plane node minikube in cluster minikube
🚜  Pulling base image ...
🔥  Creating docker container (CPUs=3, Memory=3024MB) ...
🐳  Preparing Kubernetes v1.22.2 on Docker 20.10.8 ...
    ▪ Generating certificates and keys ...
    ▪ Booting up control plane ...
    ▪ Configuring RBAC rules ...
🔎  Verifying Kubernetes components...
    ▪ Using image gcr.io/k8s-minikube/storage-provisioner:v5
🌟  Enabled addons: default-storageclass, storage-provisioner
💡  kubectl not found. If you need it, try: 'minikube kubectl -- get pods -A'
🏄  Done! kubectl is now configured to use "minikube" cluster and "default" namespace by default
</code></pre></div></div>

<p>One point to address is that when you didn’t provide the driver parameter it will automatically check, and in my case, it runs the docker driver. If you have problems finding automatic driver, maybe your user don’t have access to docker.</p>

<p>Give it a check, and fix it:</p>

<div class="language-bash highlighter-rouge"><div class="highlight"><pre class="highlight"><code><span class="nv">$ </span><span class="nb">groups
</span>minikube adm cdrom <span class="nb">sudo </span>dip plugdev lxd docker
</code></pre></div></div>

<p>If the user you are using is a regular user, it should be on docker group.</p>

<h1 id="exposing-minikube-using-docker-and-nginx">Exposing minikube using docker and nginx</h1>

<p>For the next step, we will want to expose the minikube <a href="https://kubernetes.io/docs/reference/command-line-tools-reference/kube-apiserver/">api server</a> externally.</p>

<p>To do that we will be using the nginx as reverse proxy to tunnel the traffic to the instance inside docker.</p>

<p>Keep in mind that with this setup we will manage to <strong>keep the cluster well contained</strong>, as we won’t be exposing other parts of the cluster, and the kube-api is secured through ssh and signed certificates.</p>

<p>So, moving on, after we started the minikube, you can check that minikube created a <strong>network on docker</strong>, and we will make use of that:</p>

<div class="language-bash highlighter-rouge"><div class="highlight"><pre class="highlight"><code><span class="nv">$ </span>docker network list
NETWORK ID     NAME       DRIVER    SCOPE
eae1bce0cdd2   bridge     bridge    <span class="nb">local
</span>23edcaedf34d   host       host      <span class="nb">local
</span>bf8bf1be4a17   minikube   bridge    <span class="nb">local
</span>ded619531111   none       null      <span class="nb">local</span>
</code></pre></div></div>

<p>You can also check that the minikube is running:</p>

<div class="language-bash highlighter-rouge"><div class="highlight"><pre class="highlight"><code><span class="nv">$ </span>docker ps <span class="nt">-a</span>
CONTAINER ID   IMAGE                                 COMMAND                  CREATED       STATUS       PORTS                                                                                                                                  NAMES
1dbcad6695b5   gcr.io/k8s-minikube/kicbase:v0.0.27   <span class="s2">"/usr/local/bin/entr…"</span>   2 hours ago   Up 2 hours   127.0.0.1:49157-&gt;22/tcp, 127.0.0.1:49156-&gt;2376/tcp, 127.0.0.1:49155-&gt;5000/tcp, 127.0.0.1:49154-&gt;8443/tcp, 127.0.0.1:49153-&gt;32443/tcp   minikube
</code></pre></div></div>

<p>From that you can also see that all the services are being exposed locally (<strong>bind to 127.0.0.1</strong>) and not externally.</p>

<p>We will work on that.</p>

<p>First, create this <strong>nginx</strong> file somewhere you can easily find it. In my case I created a directory named <strong>nginx</strong> in my home directory, and <strong>for my case</strong>, the full path is <strong>/home/minikube/nginx/nginx.conf</strong>:</p>

<div class="language-plaintext highlighter-rouge"><div class="highlight"><pre class="highlight"><code>user  nginx;
worker_processes  auto;
 
error_log  /var/log/nginx/error.log notice;
pid        /var/run/nginx.pid;
 
 
events {
    worker_connections  1024;
}
 
 
http {
    include       /etc/nginx/mime.types;
    default_type  application/octet-stream;
 
    log_format  main  '$remote_addr - $remote_user [$time_local] "$request" '
                      '$status $body_bytes_sent "$http_referer" '
                      '"$http_user_agent" "$http_x_forwarded_for"';
 
    access_log  /var/log/nginx/access.log  main;
 
    sendfile        on;
    #tcp_nopush     on;
 
    keepalive_timeout  65;
 
    #gzip  on;
 
    include /etc/nginx/conf.d/*.conf;
}
 
stream {
  server {
      listen 8443;
 
      #TCP traffic will be forwarded to the specified server
      proxy_pass minikube:8443;
  }
}
</code></pre></div></div>

<p>The important part of this file is the stream rule, that will stream the https content from inside docker minikube instance to outside the vm. One point to note is that it can’t be nested on http. that’s why we’ve used it on <strong>nginx.conf</strong> file, otherwise, we could have used it on conf.d configuration dir.</p>

<p>The next step will be use docker and nginx to expose the kube api, and we can do that by:</p>

<div class="language-bash highlighter-rouge"><div class="highlight"><pre class="highlight"><code><span class="nv">$ </span>docker run <span class="nt">--rm</span> <span class="nt">-it</span> <span class="nt">-d</span> <span class="se">\</span>
             <span class="nt">-v</span> /home/minikube/nginx/nginx.conf:/etc/nginx/nginx.conf <span class="se">\</span>
             <span class="nt">-p</span> 8443:8443 <span class="se">\</span>
             <span class="nt">--network</span><span class="o">=</span>minikube <span class="se">\</span>
             nginx:stable
</code></pre></div></div>

<p>Check it runs:</p>

<div class="language-bash highlighter-rouge"><div class="highlight"><pre class="highlight"><code><span class="nv">$ </span>docker ps <span class="nt">-a</span>
CONTAINER ID   IMAGE                                 COMMAND                  CREATED         STATUS         PORTS                                                                                                                                  NAMES
8eae9ba4f231   nginx:stable                          <span class="s2">"/docker-entrypoint.…"</span>   6 seconds ago   Up 3 seconds   80/tcp, 0.0.0.0:8443-&gt;8443/tcp, :::8443-&gt;8443/tcp                                                                                      pensive_germain
1dbcad6695b5   gcr.io/k8s-minikube/kicbase:v0.0.27   <span class="s2">"/usr/local/bin/entr…"</span>   2 hours ago     Up 2 hours     127.0.0.1:49157-&gt;22/tcp, 127.0.0.1:49156-&gt;2376/tcp, 127.0.0.1:49155-&gt;5000/tcp, 127.0.0.1:49154-&gt;8443/tcp, 127.0.0.1:49153-&gt;32443/tcp   minikube
</code></pre></div></div>

<p>Right, at this point we have the minikube exposed outside the vm, and we will now get the kubeconfig file to use it with kubectl.</p>

<div class="language-bash highlighter-rouge"><div class="highlight"><pre class="highlight"><code><span class="nv">$ </span>scp minikube@192.168.88.174:~/.kube/config ~/.kube/config
</code></pre></div></div>

<p>Pay attention on the ip address, you should update with the one for your vm.</p>

<p>One more step is to update the address of the kube-api on the config file. Update the config file on the following configuration path: <strong>.clusters[0].cluster.server</strong> to the address of the vm, and in my case : https://192.168.88.174:8443</p>

<p>And that’s it.</p>

<h1 id="how-it-works">How it works</h1>

<p><img src="/assets/images/2021/11/06/exposing-minikube-to-external-traffic-using-docker-and-nginx/diagram-how-it-work.png" alt="" /></p>

<ul>
  <li>1: the command kubectl will run outsite the network and it will point to the docker service exposed on vm at port 8443, from our previous docker command. One point to keep in mind is that it is binded to any address, so, it will also answer requests from outside, it is similar to the NodePort on kubernetes.</li>
  <li>2: when the request arrive to the vm, as the docker container exposed the service it will be directed to the container that exposed that port (8443), and that would be nginx.</li>
  <li><strong>keep in mind that in this step we are sharing the same network stack between those two containers, and the minikube can be accessed directly, as the internal name resolution of docker allow to reference the container by it’s name</strong></li>
  <li>3: in this step, we will stream the initial request to the minikube, and expose the 8443 port that was initially only accessible through the vm</li>
</ul>

<blockquote>
  <p>TL;DR:</p>

  <p>outside request =&gt; vm =&gt; directed to container nginx in docker network named minikube =&gt; redirect call to minikube container running in same network (docker network named minikube)</p>
</blockquote>

<p>And that’s how we get to expose only the kube-api through a secure channel without exposing or breaking the sandbox.</p>

<h1 id="testing">Testing</h1>

<p>Try the kubectl command:</p>

<div class="language-bash highlighter-rouge"><div class="highlight"><pre class="highlight"><code><span class="nv">$ </span>kubectl get nodes
NAME       STATUS   ROLES                  AGE    VERSION   INTERNAL-IP    EXTERNAL-IP   OS-IMAGE             KERNEL-VERSION       CONTAINER-RUNTIME
minikube   Ready    control-plane,master   117m   v1.22.2   192.168.49.2   &lt;none&gt;        Ubuntu 20.04.2 LTS   4.15.0-161-generic   docker://20.10.8
</code></pre></div></div>

<p>And the <strong>cluster-info</strong>:</p>

<div class="language-bash highlighter-rouge"><div class="highlight"><pre class="highlight"><code><span class="nv">$ </span>kubectl cluster-info
 
Kubernetes control plane is running at https://192.168.88.174:8443
</code></pre></div></div>]]></content><author><name></name></author><category term="devops" /><category term="kubernetes" /><category term="k8s" /><category term="minikube" /><summary type="html"><![CDATA[Introduction Things you will need to follow the steps. Working vm instance and know it’s ip address Working installation of Minikube Working installation of docker and some knowledge of how it works Motivation Kubernetes is a really amazing piece of software and as I was studying it, I didn’t want to keep relying on the cloud providers to do the testing. The next solution would be to rollout my own cluster. Though, I also didn’t want to setup a fully operational cluster. A single node, lightweight setup would do the job, that’s when I got my attention to minikube. As of now, my current infra works virtualized. The host machine runs ubuntu 18.04 and every individual environment will run in a vm using kvm/qemu with device passthrough as follows: To make use of that structure, I would have to create a new vm and install minikube on it. I would also want to be able to access it externally using kubectl. That kind of need had some caveats that I describe now: The minikube instance is not meant to be used on production: minikube is local Kubernetes, focusing on making it easy to learn and develop for Kubernetes. https://minikube.sigs.k8s.io/docs/start/ So, it should be used to run a cluster on a secure environment. Preferably on a local deploy. That’s not what I wanted. I wanted it to behave as a cluster that I could access it remotely. Though, in a secure way. minikube uses the concept of drivers, and I’ve considered some: none: runs on bare-metal docker: is the default driver ssh: will connect to the minikube cluster through ssh As I am already running the qemu/kvm on the host, I could’ve used the kvm2 driver, though, I didn’t wanted to install minikube on the host machine and wanted to keep the environments independent. Between pros and cons for my scenario, I’ve opted to run it using the docker driver. Using the default docker driver, will keep the minikube instance inside the vm machine, and I wanted to access it, using kubectl, outside of the vm, something like this: And that’s the story, let me describe the steps. 😀 Start minikube Before starting minikube, we need to find one information. The vm ip’s address. That will be very important it will be used to setup the minikube and also to connect using kubectl to the minikube, it will use a signed certificate to allow ip addresses. The next step will be to configure minikube to embed the certificates into the kubeconfig file, and we can do that by: $ minikube config get EmbedCerts true Proceeding, to start minikube so we can use it externally you will need to issue the command (don’t forget the ip address of the vm): minikube start --cpus 3 --memory 3024 --apiserver-ips=192.168.88.174 –apiserver-ips: is used to sign the certificate and allow remote connection using kubectl In case you don’t use the –apiserver-ips parameter, you will receive the following error: Unable to connect to the server: x509: certificate is valid for 192.168.49.2, 10.96.0.1, 127.0.0.1, 10.0.0.1, not 192.168.88.174 If everything turns out ok, you should see something like this: $ minikube start --cpus 3 --memory 3024 --apiserver-ips=192.168.88.174 😄 minikube v1.23.2 on Ubuntu 18.04 (kvm/amd64) ✨ Automatically selected the docker driver ❗ Your cgroup does not allow setting memory. ▪ More information: https://docs.docker.com/engine/install/linux-postinstall/#your-kernel-does-not-support-cgroup-swap-limit-capabilities 🧯 The requested memory allocation of 3024MiB does not leave room for system overhead (total system memory: 3940MiB). You may face stability issues. 💡 Suggestion: Start minikube with less memory allocated: 'minikube start --memory=3024mb' 👍 Starting control plane node minikube in cluster minikube 🚜 Pulling base image ... 🔥 Creating docker container (CPUs=3, Memory=3024MB) ... 🐳 Preparing Kubernetes v1.22.2 on Docker 20.10.8 ... ▪ Generating certificates and keys ... ▪ Booting up control plane ... ▪ Configuring RBAC rules ... 🔎 Verifying Kubernetes components... ▪ Using image gcr.io/k8s-minikube/storage-provisioner:v5 🌟 Enabled addons: default-storageclass, storage-provisioner 💡 kubectl not found. If you need it, try: 'minikube kubectl -- get pods -A' 🏄 Done! kubectl is now configured to use "minikube" cluster and "default" namespace by default One point to address is that when you didn’t provide the driver parameter it will automatically check, and in my case, it runs the docker driver. If you have problems finding automatic driver, maybe your user don’t have access to docker. Give it a check, and fix it: $ groups minikube adm cdrom sudo dip plugdev lxd docker If the user you are using is a regular user, it should be on docker group. Exposing minikube using docker and nginx For the next step, we will want to expose the minikube api server externally. To do that we will be using the nginx as reverse proxy to tunnel the traffic to the instance inside docker. Keep in mind that with this setup we will manage to keep the cluster well contained, as we won’t be exposing other parts of the cluster, and the kube-api is secured through ssh and signed certificates. So, moving on, after we started the minikube, you can check that minikube created a network on docker, and we will make use of that: $ docker network list NETWORK ID NAME DRIVER SCOPE eae1bce0cdd2 bridge bridge local 23edcaedf34d host host local bf8bf1be4a17 minikube bridge local ded619531111 none null local You can also check that the minikube is running: $ docker ps -a CONTAINER ID IMAGE COMMAND CREATED STATUS PORTS NAMES 1dbcad6695b5 gcr.io/k8s-minikube/kicbase:v0.0.27 "/usr/local/bin/entr…" 2 hours ago Up 2 hours 127.0.0.1:49157-&gt;22/tcp, 127.0.0.1:49156-&gt;2376/tcp, 127.0.0.1:49155-&gt;5000/tcp, 127.0.0.1:49154-&gt;8443/tcp, 127.0.0.1:49153-&gt;32443/tcp minikube From that you can also see that all the services are being exposed locally (bind to 127.0.0.1) and not externally. We will work on that. First, create this nginx file somewhere you can easily find it. In my case I created a directory named nginx in my home directory, and for my case, the full path is /home/minikube/nginx/nginx.conf: user nginx; worker_processes auto; error_log /var/log/nginx/error.log notice; pid /var/run/nginx.pid; events { worker_connections 1024; } http { include /etc/nginx/mime.types; default_type application/octet-stream; log_format main '$remote_addr - $remote_user [$time_local] "$request" ' '$status $body_bytes_sent "$http_referer" ' '"$http_user_agent" "$http_x_forwarded_for"'; access_log /var/log/nginx/access.log main; sendfile on; #tcp_nopush on; keepalive_timeout 65; #gzip on; include /etc/nginx/conf.d/*.conf; } stream { server { listen 8443; #TCP traffic will be forwarded to the specified server proxy_pass minikube:8443; } } The important part of this file is the stream rule, that will stream the https content from inside docker minikube instance to outside the vm. One point to note is that it can’t be nested on http. that’s why we’ve used it on nginx.conf file, otherwise, we could have used it on conf.d configuration dir. The next step will be use docker and nginx to expose the kube api, and we can do that by: $ docker run --rm -it -d \ -v /home/minikube/nginx/nginx.conf:/etc/nginx/nginx.conf \ -p 8443:8443 \ --network=minikube \ nginx:stable Check it runs: $ docker ps -a CONTAINER ID IMAGE COMMAND CREATED STATUS PORTS NAMES 8eae9ba4f231 nginx:stable "/docker-entrypoint.…" 6 seconds ago Up 3 seconds 80/tcp, 0.0.0.0:8443-&gt;8443/tcp, :::8443-&gt;8443/tcp pensive_germain 1dbcad6695b5 gcr.io/k8s-minikube/kicbase:v0.0.27 "/usr/local/bin/entr…" 2 hours ago Up 2 hours 127.0.0.1:49157-&gt;22/tcp, 127.0.0.1:49156-&gt;2376/tcp, 127.0.0.1:49155-&gt;5000/tcp, 127.0.0.1:49154-&gt;8443/tcp, 127.0.0.1:49153-&gt;32443/tcp minikube Right, at this point we have the minikube exposed outside the vm, and we will now get the kubeconfig file to use it with kubectl. $ scp minikube@192.168.88.174:~/.kube/config ~/.kube/config Pay attention on the ip address, you should update with the one for your vm. One more step is to update the address of the kube-api on the config file. Update the config file on the following configuration path: .clusters[0].cluster.server to the address of the vm, and in my case : https://192.168.88.174:8443 And that’s it. How it works 1: the command kubectl will run outsite the network and it will point to the docker service exposed on vm at port 8443, from our previous docker command. One point to keep in mind is that it is binded to any address, so, it will also answer requests from outside, it is similar to the NodePort on kubernetes. 2: when the request arrive to the vm, as the docker container exposed the service it will be directed to the container that exposed that port (8443), and that would be nginx. keep in mind that in this step we are sharing the same network stack between those two containers, and the minikube can be accessed directly, as the internal name resolution of docker allow to reference the container by it’s name 3: in this step, we will stream the initial request to the minikube, and expose the 8443 port that was initially only accessible through the vm TL;DR: outside request =&gt; vm =&gt; directed to container nginx in docker network named minikube =&gt; redirect call to minikube container running in same network (docker network named minikube) And that’s how we get to expose only the kube-api through a secure channel without exposing or breaking the sandbox. Testing Try the kubectl command: $ kubectl get nodes NAME STATUS ROLES AGE VERSION INTERNAL-IP EXTERNAL-IP OS-IMAGE KERNEL-VERSION CONTAINER-RUNTIME minikube Ready control-plane,master 117m v1.22.2 192.168.49.2 &lt;none&gt; Ubuntu 20.04.2 LTS 4.15.0-161-generic docker://20.10.8 And the cluster-info: $ kubectl cluster-info Kubernetes control plane is running at https://192.168.88.174:8443]]></summary></entry><entry><title type="html">Inject props into components using React’s high order component</title><link href="https://robsonjr.com.br/2020/12/15/inject-props-into-high-order-component-using-react" rel="alternate" type="text/html" title="Inject props into components using React’s high order component" /><published>2020-12-15T15:26:03+00:00</published><updated>2020-12-15T15:26:03+00:00</updated><id>https://robsonjr.com.br/2020/12/15/inject-props-into-high-order-component-using-react</id><content type="html" xml:base="https://robsonjr.com.br/2020/12/15/inject-props-into-high-order-component-using-react"><![CDATA[<p>Hi. With React is easy to send data down the line to children components using props. So, recently I had to inject some props into the children as I though that manually set these props into every component was too cumbersome.</p>

<p>Let me show my motivation scenario.</p>

<p>I was doing a form using <a href="https://material-ui.com/">Material-UI</a> and basically for every input field I would want to setup <strong>5 props</strong> that would be dynamic, that would be:</p>

<ul>
  <li>id</li>
  <li>error</li>
  <li>value</li>
  <li>onChange</li>
  <li>onBlur</li>
</ul>

<p>The example would be something like this:</p>

<div class="language-html highlighter-rouge"><div class="highlight"><pre class="highlight"><code><span class="nt">&lt;TextField</span> <span class="na">label=</span><span class="s">"Email"</span>
           <span class="na">helperText=</span><span class="s">"Email: user@gmail.com"</span>
           <span class="na">fullWidth</span>
           <span class="na">variant=</span><span class="s">"outlined"</span>
           <span class="na">size=</span><span class="s">"small"</span>
 
           <span class="na">id=</span><span class="s">{...}</span>
           <span class="na">error=</span><span class="s">{...}</span>
           <span class="na">value=</span><span class="s">{...}</span>
           <span class="na">onChange=</span><span class="s">{...}</span>
           <span class="na">onBlur=</span><span class="s">{...}</span>
<span class="nt">/&gt;</span>
</code></pre></div></div>

<p>So, I have looked into React documentation and saw this: <a href="https://reactjs.org/docs/react-api.html#cloneelement">React.cloneElement</a>. This would allow me to clone the element and to maintain the props, keeping all the refs. It will also receive a property with the new props that you want to merge (it just merges the props <strong>shallowly</strong>). Ant that was exactly what I wanted.</p>

<p>I have made a hoc to inject those props into the children.</p>

<div class="language-javascript highlighter-rouge"><div class="highlight"><pre class="highlight"><code><span class="k">import</span> <span class="nx">React</span> <span class="k">from</span> <span class="dl">'</span><span class="s1">react</span><span class="dl">'</span><span class="p">;</span>
 
<span class="kd">const</span> <span class="nx">withFormId</span> <span class="o">=</span> <span class="p">(</span><span class="nx">props</span><span class="p">)</span> <span class="o">=&gt;</span> <span class="p">{</span>
    <span class="k">return </span><span class="p">(</span>
        <span class="nx">React</span><span class="p">.</span><span class="nf">cloneElement</span><span class="p">(</span><span class="nx">props</span><span class="p">.</span><span class="nx">children</span><span class="p">,</span> <span class="p">{</span> <span class="na">id</span><span class="p">:</span> <span class="nx">props</span><span class="p">.</span><span class="nx">id</span><span class="p">,</span>
                                             <span class="na">error</span><span class="p">:</span> <span class="o">!</span><span class="nx">props</span><span class="p">.</span><span class="nf">formValidityFor</span><span class="p">(</span><span class="nx">props</span><span class="p">.</span><span class="nx">id</span><span class="p">),</span>
                                             <span class="na">value</span><span class="p">:</span> <span class="nx">props</span><span class="p">.</span><span class="nf">formValueFor</span><span class="p">(</span><span class="nx">props</span><span class="p">.</span><span class="nx">id</span><span class="p">),</span> 
                                             <span class="na">onChange</span><span class="p">:</span> <span class="p">(</span><span class="nx">e</span><span class="p">)</span> <span class="o">=&gt;</span> <span class="nx">props</span><span class="p">.</span><span class="nf">onChange</span><span class="p">(</span><span class="nx">e</span><span class="p">,</span> <span class="nx">props</span><span class="p">.</span><span class="nx">id</span><span class="p">),</span>
                                             <span class="na">onBlur</span><span class="p">:</span> <span class="p">(</span><span class="nx">e</span><span class="p">)</span> <span class="o">=&gt;</span> <span class="nx">props</span><span class="p">.</span><span class="nf">onBlur</span><span class="p">(</span><span class="nx">e</span><span class="p">,</span> <span class="nx">props</span><span class="p">.</span><span class="nx">id</span><span class="p">)</span>
        <span class="p">})</span>
    <span class="p">)</span>
<span class="p">}</span>
 
<span class="k">export</span> <span class="k">default</span> <span class="nx">withFormId</span><span class="p">;</span>
</code></pre></div></div>

<p>And my new form element would be as simple as:</p>

<div class="language-html highlighter-rouge"><div class="highlight"><pre class="highlight"><code><span class="nt">&lt;WithFormId</span> <span class="na">id=</span><span class="s">"form.field"</span> <span class="err">{...</span><span class="na">this.props</span><span class="err">}</span><span class="nt">&gt;</span>
    <span class="nt">&lt;TextField</span>
        <span class="na">label=</span><span class="s">"Email"</span>
        <span class="na">helperText=</span><span class="s">"Email: user@gmail.com"</span>
         
        <span class="na">fullWidth</span>
        <span class="na">variant=</span><span class="s">"outlined"</span>
        <span class="na">size=</span><span class="s">"small"</span> <span class="nt">/&gt;</span>
<span class="nt">&lt;/WithFormId&gt;</span>
</code></pre></div></div>

<p>It turns out that this solution was <strong>good enough</strong> for the situation.</p>

<p>It has it’s limitations, because I’m sending the props and dynamically fetching the attributes, so my state is kept on the main component, and each and every state update will trigger the whole form to re-rendered.</p>]]></content><author><name></name></author><category term="javascript" /><category term="react" /><summary type="html"><![CDATA[Hi. With React is easy to send data down the line to children components using props. So, recently I had to inject some props into the children as I though that manually set these props into every component was too cumbersome. Let me show my motivation scenario. I was doing a form using Material-UI and basically for every input field I would want to setup 5 props that would be dynamic, that would be: id error value onChange onBlur The example would be something like this: &lt;TextField label="Email" helperText="Email: user@gmail.com" fullWidth variant="outlined" size="small" id={...} error={...} value={...} onChange={...} onBlur={...} /&gt; So, I have looked into React documentation and saw this: React.cloneElement. This would allow me to clone the element and to maintain the props, keeping all the refs. It will also receive a property with the new props that you want to merge (it just merges the props shallowly). Ant that was exactly what I wanted. I have made a hoc to inject those props into the children. import React from 'react'; const withFormId = (props) =&gt; { return ( React.cloneElement(props.children, { id: props.id, error: !props.formValidityFor(props.id), value: props.formValueFor(props.id), onChange: (e) =&gt; props.onChange(e, props.id), onBlur: (e) =&gt; props.onBlur(e, props.id) }) ) } export default withFormId; And my new form element would be as simple as: &lt;WithFormId id="form.field" {...this.props}&gt; &lt;TextField label="Email" helperText="Email: user@gmail.com" fullWidth variant="outlined" size="small" /&gt; &lt;/WithFormId&gt; It turns out that this solution was good enough for the situation. It has it’s limitations, because I’m sending the props and dynamically fetching the attributes, so my state is kept on the main component, and each and every state update will trigger the whole form to re-rendered.]]></summary></entry><entry><title type="html">XML unmarshal example with Golang</title><link href="https://robsonjr.com.br/2020/12/11/xml-unmarshal-example-with-golang" rel="alternate" type="text/html" title="XML unmarshal example with Golang" /><published>2020-12-11T15:26:03+00:00</published><updated>2020-12-11T15:26:03+00:00</updated><id>https://robsonjr.com.br/2020/12/11/xml-unmarshal-example-with-golang</id><content type="html" xml:base="https://robsonjr.com.br/2020/12/11/xml-unmarshal-example-with-golang"><![CDATA[<p>Golang is quite a remarkable language. It is not verbose and we can happily write good code with it.</p>

<p>You should check for <a href="https://golang.org/ref/spec">Golang Specification</a> and for <a href="https://golang.org/doc/effective_go.html">Effective Go</a> in case you want to know more about the language.</p>

<p>For now, I will restrain myself with this simple example for XML unmarshall in Golang.</p>

<p>First of all, let’s start with this XML example from <a href="https://www.w3schools.com/Xml/note.xml">W3Schools</a>:</p>

<div class="language-xml highlighter-rouge"><div class="highlight"><pre class="highlight"><code><span class="cp">&lt;?xml version="1.0" encoding="utf-8" ?&gt;</span>   
<span class="nt">&lt;notebook&gt;</span>
    <span class="nt">&lt;note&gt;</span>
        <span class="nt">&lt;to&gt;</span>Tove<span class="nt">&lt;/to&gt;</span>
        <span class="nt">&lt;from&gt;</span>Jani<span class="nt">&lt;/from&gt;</span>
        <span class="nt">&lt;heading&gt;</span>Reminder<span class="nt">&lt;/heading&gt;</span>
        <span class="nt">&lt;body&gt;</span>Don't forget me this weekend!<span class="nt">&lt;/body&gt;</span>
    <span class="nt">&lt;/note&gt;</span>
<span class="nt">&lt;/notebook&gt;</span>
</code></pre></div></div>

<p>To unmarshal it in go we will have to setup a <strong>struct type</strong> for each node so we can catch all data correctly:</p>

<div class="language-go highlighter-rouge"><div class="highlight"><pre class="highlight"><code><span class="k">type</span> <span class="n">Notebook</span> <span class="k">struct</span> <span class="p">{</span>
    <span class="n">XMLName</span> <span class="n">xml</span><span class="o">.</span><span class="n">Name</span> <span class="s">`xml:"notebook"`</span>
    <span class="n">Notes</span>   <span class="p">[]</span><span class="n">Note</span>   <span class="s">`xml:"note"`</span>
<span class="p">}</span>
 
<span class="k">type</span> <span class="n">Note</span> <span class="k">struct</span> <span class="p">{</span>
    <span class="n">XMLName</span> <span class="n">xml</span><span class="o">.</span><span class="n">Name</span> <span class="s">`xml:"note"`</span>
    <span class="n">To</span>      <span class="kt">string</span>   <span class="s">`xml:"to"`</span>
    <span class="n">From</span>    <span class="kt">string</span>   <span class="s">`xml:"from"`</span>
    <span class="n">Heading</span> <span class="kt">string</span>   <span class="s">`xml:"heading"`</span>
    <span class="n">Body</span>    <span class="kt">string</span>   <span class="s">`xml:"body"`</span>
<span class="p">}</span>
</code></pre></div></div>

<p>With the types setup, reading the XML into it is quite simple: we should define a new data holder, in our case <strong>xmlData</strong>, and it’s reference will be passed to the XML Unmarshal.</p>

<div class="language-go highlighter-rouge"><div class="highlight"><pre class="highlight"><code><span class="n">xmlData</span> <span class="o">:=</span> <span class="n">Notebook</span><span class="p">{}</span>
<span class="n">err</span> <span class="o">:=</span> <span class="n">xml</span><span class="o">.</span><span class="n">Unmarshal</span><span class="p">([]</span><span class="kt">byte</span><span class="p">(</span><span class="n">xmlTest</span><span class="p">),</span> <span class="o">&amp;</span><span class="n">xmlData</span><span class="p">)</span>
<span class="k">if</span> <span class="n">err</span> <span class="o">!=</span> <span class="no">nil</span> <span class="p">{</span>
    <span class="n">fmt</span><span class="o">.</span><span class="n">Println</span><span class="p">(</span><span class="s">"error on unmarshalling"</span><span class="p">)</span>
<span class="p">}</span>
</code></pre></div></div>

<p>For a complete example reference, check below:</p>

<div class="language-go highlighter-rouge"><div class="highlight"><pre class="highlight"><code><span class="k">package</span> <span class="n">main</span>
 
<span class="k">import</span> <span class="p">(</span>
    <span class="s">"encoding/xml"</span>
    <span class="s">"fmt"</span>
<span class="p">)</span>
 
<span class="k">type</span> <span class="n">Notebook</span> <span class="k">struct</span> <span class="p">{</span>
    <span class="n">XMLName</span> <span class="n">xml</span><span class="o">.</span><span class="n">Name</span> <span class="s">`xml:"notebook"`</span>
    <span class="n">Notes</span>   <span class="p">[]</span><span class="n">Note</span>   <span class="s">`xml:"note"`</span>
<span class="p">}</span>
 
<span class="k">type</span> <span class="n">Note</span> <span class="k">struct</span> <span class="p">{</span>
    <span class="n">XMLName</span> <span class="n">xml</span><span class="o">.</span><span class="n">Name</span> <span class="s">`xml:"note"`</span>
    <span class="n">To</span>      <span class="kt">string</span>   <span class="s">`xml:"to"`</span>
    <span class="n">From</span>    <span class="kt">string</span>   <span class="s">`xml:"from"`</span>
    <span class="n">Heading</span> <span class="kt">string</span>   <span class="s">`xml:"heading"`</span>
    <span class="n">Body</span>    <span class="kt">string</span>   <span class="s">`xml:"body"`</span>
<span class="p">}</span>
 
<span class="k">func</span> <span class="n">main</span><span class="p">()</span> <span class="p">{</span>
 
    <span class="n">xmlTest</span> <span class="o">:=</span> <span class="s">`
&lt;?xml version="1.0" encoding="utf-8" ?&gt;   
&lt;notebook&gt;
    &lt;note&gt;
        &lt;to&gt;Tove&lt;/to&gt;
        &lt;from&gt;Jani&lt;/from&gt;
        &lt;heading&gt;Reminder&lt;/heading&gt;
        &lt;body&gt;Don't forget me this weekend!&lt;/body&gt;
    &lt;/note&gt;
&lt;/notebook&gt;
    `</span>
 
    <span class="n">xmlData</span> <span class="o">:=</span> <span class="n">Notebook</span><span class="p">{}</span>
    <span class="n">err</span> <span class="o">:=</span> <span class="n">xml</span><span class="o">.</span><span class="n">Unmarshal</span><span class="p">([]</span><span class="kt">byte</span><span class="p">(</span><span class="n">xmlTest</span><span class="p">),</span> <span class="o">&amp;</span><span class="n">xmlData</span><span class="p">)</span>
    <span class="k">if</span> <span class="n">err</span> <span class="o">!=</span> <span class="no">nil</span> <span class="p">{</span>
        <span class="n">fmt</span><span class="o">.</span><span class="n">Println</span><span class="p">(</span><span class="s">"error on unmarshalling"</span><span class="p">)</span>
    <span class="p">}</span>
 
    <span class="n">fmt</span><span class="o">.</span><span class="n">Println</span><span class="p">(</span><span class="n">xmlData</span><span class="p">)</span>
<span class="p">}</span>
</code></pre></div></div>]]></content><author><name></name></author><category term="golang" /><category term="go" /><category term="unmarshal" /><summary type="html"><![CDATA[Golang is quite a remarkable language. It is not verbose and we can happily write good code with it. You should check for Golang Specification and for Effective Go in case you want to know more about the language. For now, I will restrain myself with this simple example for XML unmarshall in Golang. First of all, let’s start with this XML example from W3Schools: &lt;?xml version="1.0" encoding="utf-8" ?&gt; &lt;notebook&gt; &lt;note&gt; &lt;to&gt;Tove&lt;/to&gt; &lt;from&gt;Jani&lt;/from&gt; &lt;heading&gt;Reminder&lt;/heading&gt; &lt;body&gt;Don't forget me this weekend!&lt;/body&gt; &lt;/note&gt; &lt;/notebook&gt; To unmarshal it in go we will have to setup a struct type for each node so we can catch all data correctly: type Notebook struct { XMLName xml.Name `xml:"notebook"` Notes []Note `xml:"note"` } type Note struct { XMLName xml.Name `xml:"note"` To string `xml:"to"` From string `xml:"from"` Heading string `xml:"heading"` Body string `xml:"body"` } With the types setup, reading the XML into it is quite simple: we should define a new data holder, in our case xmlData, and it’s reference will be passed to the XML Unmarshal. xmlData := Notebook{} err := xml.Unmarshal([]byte(xmlTest), &amp;xmlData) if err != nil { fmt.Println("error on unmarshalling") } For a complete example reference, check below: package main import ( "encoding/xml" "fmt" ) type Notebook struct { XMLName xml.Name `xml:"notebook"` Notes []Note `xml:"note"` } type Note struct { XMLName xml.Name `xml:"note"` To string `xml:"to"` From string `xml:"from"` Heading string `xml:"heading"` Body string `xml:"body"` } func main() { xmlTest := ` &lt;?xml version="1.0" encoding="utf-8" ?&gt; &lt;notebook&gt; &lt;note&gt; &lt;to&gt;Tove&lt;/to&gt; &lt;from&gt;Jani&lt;/from&gt; &lt;heading&gt;Reminder&lt;/heading&gt; &lt;body&gt;Don't forget me this weekend!&lt;/body&gt; &lt;/note&gt; &lt;/notebook&gt; ` xmlData := Notebook{} err := xml.Unmarshal([]byte(xmlTest), &amp;xmlData) if err != nil { fmt.Println("error on unmarshalling") } fmt.Println(xmlData) }]]></summary></entry><entry><title type="html">External audio card control on Ubuntu</title><link href="https://robsonjr.com.br/2020/12/01/external-audio-card-control-on-ubuntu" rel="alternate" type="text/html" title="External audio card control on Ubuntu" /><published>2020-12-01T15:26:03+00:00</published><updated>2020-12-01T15:26:03+00:00</updated><id>https://robsonjr.com.br/2020/12/01/external-audio-card-control-on-ubuntu</id><content type="html" xml:base="https://robsonjr.com.br/2020/12/01/external-audio-card-control-on-ubuntu"><![CDATA[<p>Recently my headset broke. It was a Sony Pulse from PS3 and I liked it a lot because being USB I could easily passthrough to my VM as I use a couple of Qemu/KVM machines.</p>

<p>For replacing it, I wanted something simple that I could improve without realying on a USB only headset.</p>

<p>I have choose an external USB sound card named <strong>Sharkoon Gaming DAC Pro S</strong> with a new headset that uses a P3 plug. I prefered this kind of solution because I could swap the headset easily and the external audio card have a good audio.</p>

<p>There’s a catch though. I had a very low volume capture of my microphone and it wasn’t even hearable on recordings. I wanted to boost the input volume gain.</p>

<p>As of now, I can’t get the volume controls from the <strong>alsamixer</strong> control, I get the following screen.</p>

<p><img src="/assets/images/2020/12/01/external-audio-card-control-on-ubuntu/Screenshot-from-2020-12-01-17-16-45.png" alt="" /></p>

<p>Through the Ubuntu’s input settings, even with the slider at the maximum I couldn’t get it to be usable.</p>

<p><img src="/assets/images/2020/12/01/external-audio-card-control-on-ubuntu/Screenshot-from-2020-12-01-17-17-44.png" alt="" /></p>

<p>I went to search for a solution and found that the <strong>PulseAudio Volume Control</strong> had more options to control and tweak.</p>

<div class="language-bash highlighter-rouge"><div class="highlight"><pre class="highlight"><code>apt-get <span class="nb">install </span>pavucontrol
</code></pre></div></div>

<p>It solved my problem as I could tweak the input audio, increasing the gain and get the microphone to record it higher.</p>

<p><img src="/assets/images/2020/12/01/external-audio-card-control-on-ubuntu/Screenshot-from-2020-12-01-17-24-45.png" alt="" /></p>

<p>It even have the possibility to tweak the levels of a recording app at the <strong>Recording</strong> tab. 😀</p>]]></content><author><name></name></author><category term="os" /><category term="linux" /><summary type="html"><![CDATA[Recently my headset broke. It was a Sony Pulse from PS3 and I liked it a lot because being USB I could easily passthrough to my VM as I use a couple of Qemu/KVM machines. For replacing it, I wanted something simple that I could improve without realying on a USB only headset. I have choose an external USB sound card named Sharkoon Gaming DAC Pro S with a new headset that uses a P3 plug. I prefered this kind of solution because I could swap the headset easily and the external audio card have a good audio. There’s a catch though. I had a very low volume capture of my microphone and it wasn’t even hearable on recordings. I wanted to boost the input volume gain. As of now, I can’t get the volume controls from the alsamixer control, I get the following screen. Through the Ubuntu’s input settings, even with the slider at the maximum I couldn’t get it to be usable. I went to search for a solution and found that the PulseAudio Volume Control had more options to control and tweak. apt-get install pavucontrol It solved my problem as I could tweak the input audio, increasing the gain and get the microphone to record it higher. It even have the possibility to tweak the levels of a recording app at the Recording tab. 😀]]></summary></entry><entry><title type="html">A thought about state in React</title><link href="https://robsonjr.com.br/2020/11/01/a-thought-about-state-in-react" rel="alternate" type="text/html" title="A thought about state in React" /><published>2020-11-01T15:26:03+00:00</published><updated>2020-11-01T15:26:03+00:00</updated><id>https://robsonjr.com.br/2020/11/01/a-thought-about-state-in-react</id><content type="html" xml:base="https://robsonjr.com.br/2020/11/01/a-thought-about-state-in-react"><![CDATA[<p>React is an amazing lib (some would call it a framework, I won’t digress about it though), and allow to use javascript in a way that will help to keep code simple and maintainable.</p>

<p>So, when writing a programs, we should keep some data around to maintain the state of our application. And React allow this with <strong>state</strong>.</p>

<p>In React, when we wanted to keep those states, we should always opt-in for <strong>class components</strong> and keep <strong>functional components</strong> for attachable functionality that wouldn’t keep states.</p>

<p>That changed though. In React <strong>16.8</strong>, <a href="https://reactjs.org/docs/hooks-intro.html">hooks</a> were introduced to allow functional components to be able to hold state. It’s use is simple enough to allow it to be used right away:</p>

<div class="language-javascript highlighter-rouge"><div class="highlight"><pre class="highlight"><code><span class="k">import</span> <span class="nx">React</span><span class="p">,</span> <span class="p">{</span> <span class="nx">useState</span> <span class="p">}</span> <span class="k">from</span> <span class="dl">'</span><span class="s1">react</span><span class="dl">'</span><span class="p">;</span>
 
<span class="kd">function</span> <span class="nf">MyFunctionalStatefullComponent</span><span class="p">()</span> <span class="p">{</span>
 
  <span class="c1">// the useState will return a pair, </span>
  <span class="c1">// the first element is the data holder</span>
  <span class="c1">// the second is the function to update this data holder</span>
  <span class="kd">const</span> <span class="p">[</span><span class="nx">count</span><span class="p">,</span> <span class="nx">setCount</span><span class="p">]</span> <span class="o">=</span> <span class="nf">useState</span><span class="p">(</span><span class="mi">0</span><span class="p">);</span>
 
  <span class="k">return </span><span class="p">(</span>
    <span class="p">...</span>
  <span class="p">);</span>
<span class="p">}</span>
</code></pre></div></div>

<p>Please, be aware that when using React Hooks, you should have a matching <strong>React Dom version</strong>, otherwise you will get the following error:</p>

<blockquote>
  <p><strong>Invariant Violation</strong> <br />
Hooks can only be called inside the body of a function component. (https://fb.me/react-invalid-hook-call)</p>
</blockquote>

<p>Lets take a look in the following codes, starting with class component:</p>

<div class="language-javascript highlighter-rouge"><div class="highlight"><pre class="highlight"><code><span class="k">import</span> <span class="nx">React</span><span class="p">,</span> <span class="p">{</span> <span class="nx">useState</span> <span class="p">}</span> <span class="k">from</span> <span class="dl">'</span><span class="s1">react</span><span class="dl">'</span>
 
<span class="kd">class</span> <span class="nc">App</span> <span class="kd">extends</span> <span class="nc">React</span><span class="p">.</span><span class="nx">Component</span> <span class="p">{</span>
  <span class="nx">state</span> <span class="o">=</span> <span class="p">{</span>
    <span class="na">count</span><span class="p">:</span> <span class="mi">0</span><span class="p">,</span>
    <span class="na">nome</span><span class="p">:</span> <span class="dl">"</span><span class="s2">John</span><span class="dl">"</span>
  <span class="p">}</span>
 
  <span class="nx">increaseHandle</span> <span class="o">=</span> <span class="p">()</span> <span class="o">=&gt;</span> <span class="p">{</span>
    <span class="kd">var</span> <span class="nx">newCount</span> <span class="o">=</span> <span class="k">this</span><span class="p">.</span><span class="nx">state</span><span class="p">.</span><span class="nx">count</span> <span class="o">+</span> <span class="mi">1</span><span class="p">;</span>
    <span class="k">this</span><span class="p">.</span><span class="nf">setState</span><span class="p">({</span><span class="na">count</span><span class="p">:</span> <span class="nx">newCount</span><span class="p">});</span>
    <span class="nx">console</span><span class="p">.</span><span class="nf">log</span><span class="p">(</span><span class="k">this</span><span class="p">.</span><span class="nx">state</span><span class="p">);</span>
  <span class="p">}</span>
 
  <span class="nf">render</span><span class="p">()</span> <span class="p">{</span>
    <span class="k">return </span><span class="p">(</span>
      <span class="o">&lt;</span><span class="nx">div</span><span class="o">&gt;</span>
      <span class="o">&lt;</span><span class="nx">span</span><span class="o">&gt;</span><span class="p">{</span><span class="k">this</span><span class="p">.</span><span class="nx">state</span><span class="p">.</span><span class="nx">count</span><span class="p">}</span><span class="o">&lt;</span><span class="sr">/span</span><span class="err">&gt;
</span>      <span class="o">&lt;</span><span class="nx">button</span> <span class="nx">onClick</span><span class="o">=</span><span class="p">{</span><span class="k">this</span><span class="p">.</span><span class="nx">increaseHandle</span><span class="p">}</span><span class="o">&gt;</span><span class="nx">Increase</span><span class="o">&lt;</span><span class="sr">/button</span><span class="err">&gt;
</span>    <span class="o">&lt;</span><span class="sr">/div</span><span class="err">&gt;
</span>    <span class="p">)</span>
  <span class="p">}</span>
<span class="p">}</span>
 
<span class="k">export</span> <span class="k">default</span> <span class="nx">App</span><span class="p">;</span>
</code></pre></div></div>

<p>Next, we will take a look in a functional component:</p>

<div class="language-javascript highlighter-rouge"><div class="highlight"><pre class="highlight"><code><span class="k">import</span> <span class="nx">React</span><span class="p">,</span> <span class="p">{</span> <span class="nx">useState</span> <span class="p">}</span> <span class="k">from</span> <span class="dl">'</span><span class="s1">react</span><span class="dl">'</span>

<span class="kd">function</span> <span class="nf">App</span><span class="p">()</span> <span class="p">{</span>
    <span class="kd">const</span> <span class="p">[</span><span class="nx">data</span><span class="p">,</span> <span class="nx">setData</span><span class="p">]</span> <span class="o">=</span> <span class="nf">useState</span><span class="p">({</span>
        <span class="na">count</span><span class="p">:</span> <span class="mi">0</span><span class="p">,</span>
        <span class="na">name</span><span class="p">:</span> <span class="dl">"</span><span class="s2">John</span><span class="dl">"</span>
    <span class="p">});</span>

    <span class="kd">const</span> <span class="nx">increaseHandle</span> <span class="o">=</span> <span class="p">()</span> <span class="o">=&gt;</span> <span class="p">{</span>
        <span class="kd">var</span> <span class="nx">newCount</span> <span class="o">=</span> <span class="nx">data</span><span class="p">.</span><span class="nx">count</span> <span class="o">+</span> <span class="mi">1</span><span class="p">;</span>
        <span class="nf">setData</span><span class="p">({</span><span class="na">count</span><span class="p">:</span> <span class="nx">newCount</span><span class="p">});</span>
        <span class="nx">console</span><span class="p">.</span><span class="nf">log</span><span class="p">(</span><span class="nx">data</span><span class="p">);</span>
    <span class="p">};</span>

    <span class="k">return </span><span class="p">(</span>
        <span class="o">&lt;</span><span class="nx">div</span><span class="o">&gt;</span>
            <span class="o">&lt;</span><span class="nx">span</span><span class="o">&gt;</span><span class="p">{</span><span class="nx">data</span><span class="p">.</span><span class="nx">count</span><span class="p">}</span><span class="o">&lt;</span><span class="sr">/span</span><span class="err">&gt;
</span>            <span class="o">&lt;</span><span class="nx">button</span> <span class="nx">onClick</span><span class="o">=</span><span class="p">{</span><span class="nx">increaseHandle</span><span class="p">}</span><span class="o">&gt;</span><span class="nx">Increase</span><span class="o">&lt;</span><span class="sr">/button</span><span class="err">&gt;
</span>        <span class="o">&lt;</span><span class="sr">/div</span><span class="err">&gt;
</span>    <span class="p">);</span>
<span class="p">};</span>

<span class="k">export</span> <span class="k">default</span> <span class="nx">App</span><span class="p">;</span>
</code></pre></div></div>

<p>So, you may ask. <strong>What is the difference?</strong> And I would answer, on the <strong>class component</strong>, it will automatically merge the new state with the old state, and the execution will be something like this:</p>

<div class="language-plaintext highlighter-rouge"><div class="highlight"><pre class="highlight"><code>Click Increase Button =&gt; {count: 0, nome: "John"}
Click Increase Button =&gt; {count: 1, nome: "John"}
Click Increase Button =&gt; {count: 2, nome: "John"}
...
</code></pre></div></div>

<p>That’s not what happens on the <strong>functional component using hooks</strong>, they differ and every state update with hooks will replace the old state, and the execution will be something like this:</p>

<div class="language-plaintext highlighter-rouge"><div class="highlight"><pre class="highlight"><code>Click Increase Button =&gt; {count: 0, nome: "John"}
Click Increase Button =&gt; {count: 1}
Click Increase Button =&gt; {count: 2}
...
</code></pre></div></div>

<p>That’s a small difference in result that have a huge impact in the application if you don’t pay attention.</p>

<p>We can fix this behavior using the javascript <strong>spread (…) operator</strong> and update the state completely, instead a partial update. We could change (in the <strong>functional component</strong>) the following code:</p>

<div class="language-javascript highlighter-rouge"><div class="highlight"><pre class="highlight"><code><span class="p">...</span>

<span class="kd">const</span> <span class="nx">increaseHandle</span> <span class="o">=</span> <span class="p">()</span> <span class="o">=&gt;</span> <span class="p">{</span>
    <span class="kd">var</span> <span class="nx">newData</span> <span class="o">=</span> <span class="p">{</span>
        <span class="p">...</span><span class="nx">data</span><span class="p">,</span>
        <span class="na">count</span><span class="p">:</span> <span class="nx">data</span><span class="p">.</span><span class="nx">count</span> <span class="o">+</span> <span class="mi">1</span>
    <span class="p">};</span>
    <span class="nf">setData</span><span class="p">(</span><span class="nx">newData</span><span class="p">);</span>
    <span class="nx">console</span><span class="p">.</span><span class="nf">log</span><span class="p">(</span><span class="nx">data</span><span class="p">);</span>
<span class="p">};</span>

<span class="p">...</span>
</code></pre></div></div>

<p>Taka a look at the <strong>…data</strong>, that is the spread operator, it will copy and expand the said object into a new one, and it will be possible update the new attributes that we want update and in our example that would be <strong>count: data.count + 1</strong></p>

<p>With this little change our class component and functional component will have the same behavior.</p>

<p>You can give it a try at <a href="https://codesandbox.io/s/react-playground-forked-p368i?file=/index.js">codesandbox</a>.</p>]]></content><author><name></name></author><category term="javascript" /><category term="react" /><summary type="html"><![CDATA[React is an amazing lib (some would call it a framework, I won’t digress about it though), and allow to use javascript in a way that will help to keep code simple and maintainable. So, when writing a programs, we should keep some data around to maintain the state of our application. And React allow this with state. In React, when we wanted to keep those states, we should always opt-in for class components and keep functional components for attachable functionality that wouldn’t keep states. That changed though. In React 16.8, hooks were introduced to allow functional components to be able to hold state. It’s use is simple enough to allow it to be used right away: import React, { useState } from 'react'; function MyFunctionalStatefullComponent() { // the useState will return a pair, // the first element is the data holder // the second is the function to update this data holder const [count, setCount] = useState(0); return ( ... ); } Please, be aware that when using React Hooks, you should have a matching React Dom version, otherwise you will get the following error: Invariant Violation Hooks can only be called inside the body of a function component. (https://fb.me/react-invalid-hook-call) Lets take a look in the following codes, starting with class component: import React, { useState } from 'react' class App extends React.Component { state = { count: 0, nome: "John" } increaseHandle = () =&gt; { var newCount = this.state.count + 1; this.setState({count: newCount}); console.log(this.state); } render() { return ( &lt;div&gt; &lt;span&gt;{this.state.count}&lt;/span&gt; &lt;button onClick={this.increaseHandle}&gt;Increase&lt;/button&gt; &lt;/div&gt; ) } } export default App; Next, we will take a look in a functional component: import React, { useState } from 'react' function App() { const [data, setData] = useState({ count: 0, name: "John" }); const increaseHandle = () =&gt; { var newCount = data.count + 1; setData({count: newCount}); console.log(data); }; return ( &lt;div&gt; &lt;span&gt;{data.count}&lt;/span&gt; &lt;button onClick={increaseHandle}&gt;Increase&lt;/button&gt; &lt;/div&gt; ); }; export default App; So, you may ask. What is the difference? And I would answer, on the class component, it will automatically merge the new state with the old state, and the execution will be something like this: Click Increase Button =&gt; {count: 0, nome: "John"} Click Increase Button =&gt; {count: 1, nome: "John"} Click Increase Button =&gt; {count: 2, nome: "John"} ... That’s not what happens on the functional component using hooks, they differ and every state update with hooks will replace the old state, and the execution will be something like this: Click Increase Button =&gt; {count: 0, nome: "John"} Click Increase Button =&gt; {count: 1} Click Increase Button =&gt; {count: 2} ... That’s a small difference in result that have a huge impact in the application if you don’t pay attention. We can fix this behavior using the javascript spread (…) operator and update the state completely, instead a partial update. We could change (in the functional component) the following code: ... const increaseHandle = () =&gt; { var newData = { ...data, count: data.count + 1 }; setData(newData); console.log(data); }; ... Taka a look at the …data, that is the spread operator, it will copy and expand the said object into a new one, and it will be possible update the new attributes that we want update and in our example that would be count: data.count + 1 With this little change our class component and functional component will have the same behavior. You can give it a try at codesandbox.]]></summary></entry><entry><title type="html">A lightweight self-hosted alternative to github</title><link href="https://robsonjr.com.br/2020/10/27/a-lightweight-self-hosted-alternative-to-github" rel="alternate" type="text/html" title="A lightweight self-hosted alternative to github" /><published>2020-10-27T15:26:03+00:00</published><updated>2020-10-27T15:26:03+00:00</updated><id>https://robsonjr.com.br/2020/10/27/a-lightweight-self-hosted-alternative-to-github</id><content type="html" xml:base="https://robsonjr.com.br/2020/10/27/a-lightweight-self-hosted-alternative-to-github"><![CDATA[<p>Every developer should track their work using some sort of version manager. It’s something that will save a lot of trouble when trying to rollback a change or add new code with the security that you can audit what’s being added.</p>

<p>In that light, I thought it would be a good idea to have a secure place to hold data, on my own, of work that I have saved on private repositories at Github.</p>

<p>I had a small feature set in mind:</p>

<ul>
  <li>be able to secure my code locally</li>
  <li>have complete control over who was able to reach it</li>
  <li>a reliable service that I could access from everywhere in a secure form</li>
</ul>

<p>With those assumptions on mind I started to look for a alternative. But every one was just packed of features, they were complex and I wanted something simple.</p>

<p>That’s when I decided do come up with something on my own.</p>

<p>For the frontend and repository view I used <a href="https://git.zx2c4.com/cgit/">cgit</a>. And for the backend I have used <a href="https://gitolite.com/gitolite/index.html">gitolite</a>.</p>

<p>I think they both are amazing projects. They are stable, robust, secure and simple.</p>

<ul>
  <li>cgit is a well established project, it is currently used to serve kernel.org</li>
  <li>gitolite is an amazing project, that uses ssh to control access to source code.</li>
</ul>

<p>It’s possible to customize a lot with this combination.</p>

<p>I have added a thin layer for authentication and authorization using <a href="https://en.wikipedia.org/wiki/Basic_access_authentication">basic access authentication</a> using cookies and <a href="https://github.com/mruby/mruby">mruby</a>.</p>

<p>If you got interested, please, give it a look at <a href="https://github.com/robsonjrce/lightweight-git">lightweight-git at github</a>.</p>]]></content><author><name></name></author><category term="git" /><category term="cgit" /><category term="gitolite" /><summary type="html"><![CDATA[Every developer should track their work using some sort of version manager. It’s something that will save a lot of trouble when trying to rollback a change or add new code with the security that you can audit what’s being added. In that light, I thought it would be a good idea to have a secure place to hold data, on my own, of work that I have saved on private repositories at Github. I had a small feature set in mind: be able to secure my code locally have complete control over who was able to reach it a reliable service that I could access from everywhere in a secure form With those assumptions on mind I started to look for a alternative. But every one was just packed of features, they were complex and I wanted something simple. That’s when I decided do come up with something on my own. For the frontend and repository view I used cgit. And for the backend I have used gitolite. I think they both are amazing projects. They are stable, robust, secure and simple. cgit is a well established project, it is currently used to serve kernel.org gitolite is an amazing project, that uses ssh to control access to source code. It’s possible to customize a lot with this combination. I have added a thin layer for authentication and authorization using basic access authentication using cookies and mruby. If you got interested, please, give it a look at lightweight-git at github.]]></summary></entry><entry><title type="html">PHPUnit 7 testsuit upgrade</title><link href="https://robsonjr.com.br/scratchpad/level/relative/" rel="alternate" type="text/html" title="PHPUnit 7 testsuit upgrade" /><published>2018-10-08T15:26:03+00:00</published><updated>2018-10-08T15:26:03+00:00</updated><id>https://robsonjr.com.br/scratchpad/level/phpunit-7-testsuit-upgrade</id><content type="html" xml:base="https://robsonjr.com.br/scratchpad/level/relative/"><![CDATA[<p>As of PHPUnit 6 have made breaking changes, we should update our testsuit to conform the following</p>

<div class="language-php highlighter-rouge"><div class="highlight"><pre class="highlight"><code><span class="c1">// PHPUnit 6 introduced a breaking change that</span>
<span class="c1">// removed PHPUnit_Framework_TestCase as a base class,</span>
<span class="c1">// and replaced it with \PHPUnit\Framework\TestCase</span>
</code></pre></div></div>

<p>It should be known that PHPUnit 7 has the extension as dependency</p>

<ul>
  <li>php-mbstring</li>
</ul>

<div class="language-php highlighter-rouge"><div class="highlight"><pre class="highlight"><code><span class="kd">class</span> <span class="nc">MethodNotAllowedExceptionTest</span> <span class="kd">extends</span> <span class="nc">PHPUnit_Framework_TestCase</span> <span class="p">{</span>
<span class="mf">...</span>
<span class="p">}</span>
</code></pre></div></div>

<p>should be replaced for</p>

<div class="language-php highlighter-rouge"><div class="highlight"><pre class="highlight"><code><span class="kn">use</span> <span class="nc">PHPUnit\Framework\TestCase</span><span class="p">;</span>

<span class="kd">class</span> <span class="nc">MethodNotAllowedExceptionTest</span> <span class="kd">extends</span> <span class="nc">TestCase</span> <span class="p">{</span>
<span class="mf">...</span>
<span class="p">}</span>
</code></pre></div></div>]]></content><author><name></name></author><category term="php" /><category term="phpunit" /><summary type="html"><![CDATA[As of PHPUnit 6 have made breaking changes, we should update our testsuit to conform the following // PHPUnit 6 introduced a breaking change that // removed PHPUnit_Framework_TestCase as a base class, // and replaced it with \PHPUnit\Framework\TestCase It should be known that PHPUnit 7 has the extension as dependency php-mbstring class MethodNotAllowedExceptionTest extends PHPUnit_Framework_TestCase { ... } should be replaced for use PHPUnit\Framework\TestCase; class MethodNotAllowedExceptionTest extends TestCase { ... }]]></summary></entry></feed>